TI Launchpad Dev Kit for under $5!
by firestorm_v1 on Nov.05, 2010, under Hardware, Microcontrollers, Product Reviews
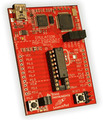 So many months ago (in June), Hackaday and Make were all abuzz about the TI Launchpad which is a new development platform centered around the TI MSP430 microprocessor. The most interesting thing aside from the processor spec itself was that the entire platform came under $5 for a professionally built development kit. I placed my order and in a week, I got a backorder slip and eventually forgot about it. (June is years ago for those of us with ADD.) Well even though I had forgotten about it, TI had not. A couple of days ago, I got a call from the apartment complex that it had arrived! Read on to find out what all’s in the box!
A little background on the TI MSP430 first.
This is TI’s approach to the microcontroller market that is not targeted at the industrial segment, but rather at us the hardware DIY crowd. I have to admit that they did it right with the $4.30 price point and I can’t wait to get started. The kit includes two of the MSP430 chips:
- MSP430G2211IPN14 -2kB of on-die flash, 128 bytes of RAM, 10 GPIO pins, One 16-bit timer, a Watchdog timer, a BOR and a comparator. You can download the datasheet from here.
- MSP430G2231IPN14 – 2kB of on-die flash, 128 bytes of RAM, 10 GPIO pins, One 16-bit timer, a Watchdog timer, a BOR, a Serial Interface (for I2C or SPI), an internal temperature sensor and an 8 channel 10bit ADC. This chip’s datasheet can be found here.
The 2231 chip comes preinstalled and pre-programmed with a basic temperature demo which shows off the internal temperature sensor. It’s definitely more than the blinking LED demo that comes with most sample programs.
So, let’s take a look at the thing.
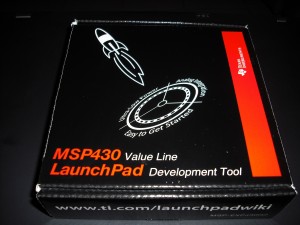
The box comes in a very nice black cardboard box with TI’s launchpad Wiki printed on the front. On the back of the box is TI’s other site URL straight to the chip specs, http://www.ti.com/430value.
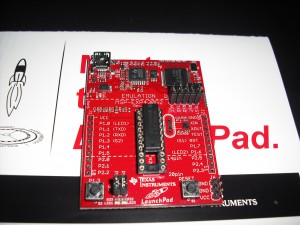
The board itself is in a small anti-static bag, and when you open it up, you get a red development board like above. There is a chip pre-programmed and ready to go. Just like the Arduino, this board is USB powered and USB programmed. There is a socket in the middle that you can plug a chip into, program, and then remove for use in your own projects or breadboard. For the Arduino crowd, there is even a couple of headers included to populate the left and right solder pads for an easy method of attaching jumpers to the board for prototyping.
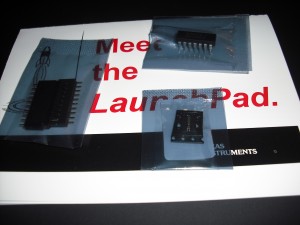
In addition to the development board, you also get the above accessories. Left is the two single row headers for the board (both female connector and male pins are included). At the top is the second chip, (the chip without SPI/I2C and the Serial interface) and in the foreground is a 32.768kHz crystal that you can solder onto the development board for a more accurate clock. The MSP430’s do include their own internal clock source however for those time sensitive projects, the external crystal is preferred and this board gives you you ready access to it should you find you need one. Also included is a USB A to Mini-B cable.
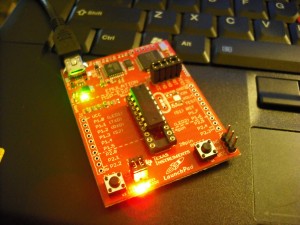
Plugged in and ready for action!
Here is a picture of the board plugged in and ready to rock. Although the LED’s brightness blurs the camera, there is a red LED and a green LED located next to the switch in the foreground. When you first apply power to the board, the back LED (near the USB header) lights indicating power is applied, and the two LEDs near the left switch blink alternating, indicating that the chip is ready to be programmed. In this image, I was using the chip that was already inserted, so all I had to do to run the simple test application was to hit the left pushbutton and start the program.
According to the wiki page, there are nine variants of the MSP430, some offering more flash (code) storage, some offering additional features however they are all pretty consistent at the 128-byte RAM. Many people on the Hack-a-day article expressed concern at the windows only compiler however Hack-a-day released another article later on about how to code it in our favorite OS.
Generally speaking, cost has been the #1 thing that has distracted me from getting started with the Arduino ($35 for a board) and the PIC microcontroller suffers the same fate. While the chips for each are quite inexpensive, it’s the programmers that usually ends up costing you in the end. TI definitely has my attention with a $5 price point and extra chips. I look forward to playing around with it very soon!
If you’ve gotten ahold of one of these, please let me know what you’ve done in the comments. I’ve read several articles on Hack-a-day which have been appealing to me, especially the low power article here.
Happy Hacking!
FIRESTORM_v1
February 11th, 2011 on 2:30 pm
I just got mine running on my Gentoo desktop last night. I was stubborn and wanted to use portage to install the toolchain but that was a nightmare. It requires adding an overlay which in turn requires all sorts of stuff from ~ (equivalent to Debian’s testing) to be installed, including Portage (equiv to apt-get) itself! It was so much easier to just follow the hackaday directions!
First thing i did was to compile and flash the blink demo from the hackaday article. I obliterated the temp sensor demo before I even knew it was there. Oh well, it wasn’t important anyway. 🙂 I’m just happy to see this thing running under Linux.
April 7th, 2011 on 4:34 pm
I am curious to see what people buy as an accessory to this board. I would really like to have a solderless prototyping solution for using with the TI Launchpad. Would anyone know of a provider?