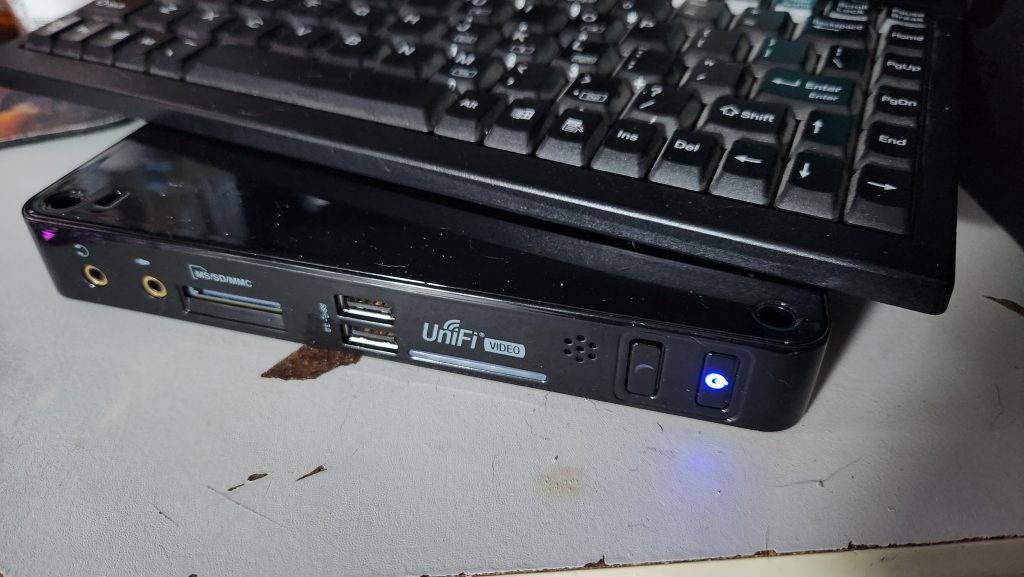
Over the weekend, I was digging through the expansive parts bin known as the computer room and I had my old Unifi Video NVR jump off the shelf at me. While the Unifi Video product has long since been discontinued, giving way to the Unifi Protect line of NVRs and products, the hardware itself still has a bit of life left to it. In this article, I’ll go over the hardware of the derelict product and see what we can do with it going forward.
Unifi Video or Unifi Protect?
This article is about the derelict product, the Unifi Video NVR (UVC-NVR-2TB), not their “current-gen” Unifi Protect NVR. Think of the Video NVR as their “version 1”, with the Unifi Protect line being their Version 2+.
When Unifi announced the sunsetting of the Unifi Video NVR in 2020, they offered a rebate on a new Unifi Protect NVR via claiming a discount using the MAC address of the old product. (This has since been discontinued). While it was a good option for those looking to transition to the new platform (and newer, more capable hardware), it did end up leaving behind a small problem. What to do with the old Video NVR?
In my particular case, I still had the old Video NVR, now rendered useless for its intended purpose, so rather than toss it, I banished it to the depths of the parts closet for the day where I’d find out what to do with the hardware. Well that day was a few days ago so here I am writing about it as there wasn’t much information at all on the Internet about the product nor the underlying hardware… or so I thought.
Unifi Video – Foxconn in disguise?
The first step in figuring out what to do with a piece of unusual hardware was to crack the case open and take a gander as to what’s inside. I used a knife to remove the four round plastic covers off the recessed screw holes and unscrewed the four Phillips screws, then popped the cover off to see what was inside.
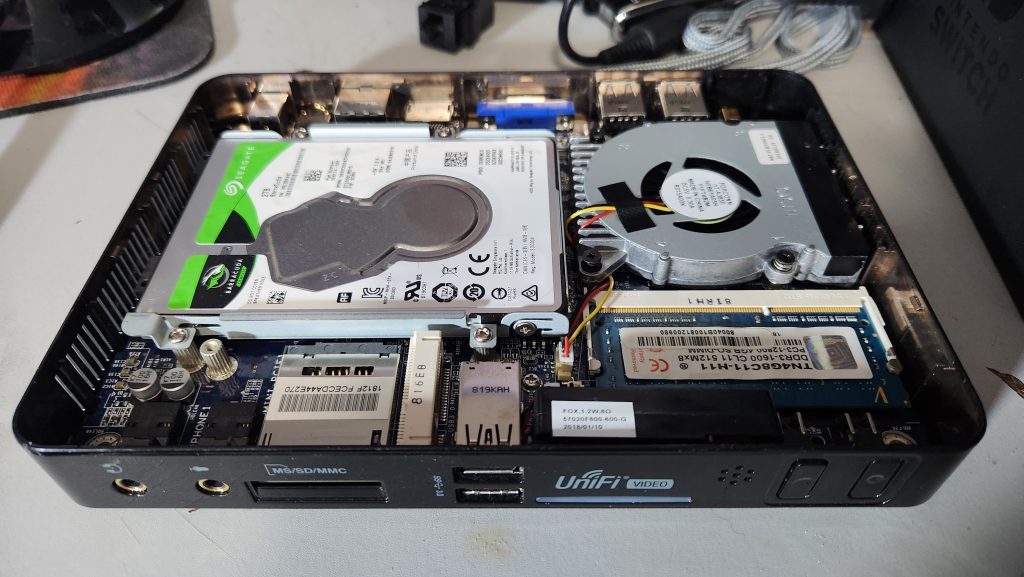
I removed the hard drive and started looking for identifiers and found a model number, nT-iBT18NVR and a cursory Google search landed me on a Newegg product link that looked strikingly like the old Unifi Video product. Through reading the reviews, Q and A section, and additional digging, I was able to find out a lot about the product, the biggest of which being that this was originally a Foxconn product (yes, that Foxconn, the iphones and suicide fences Foxconn).
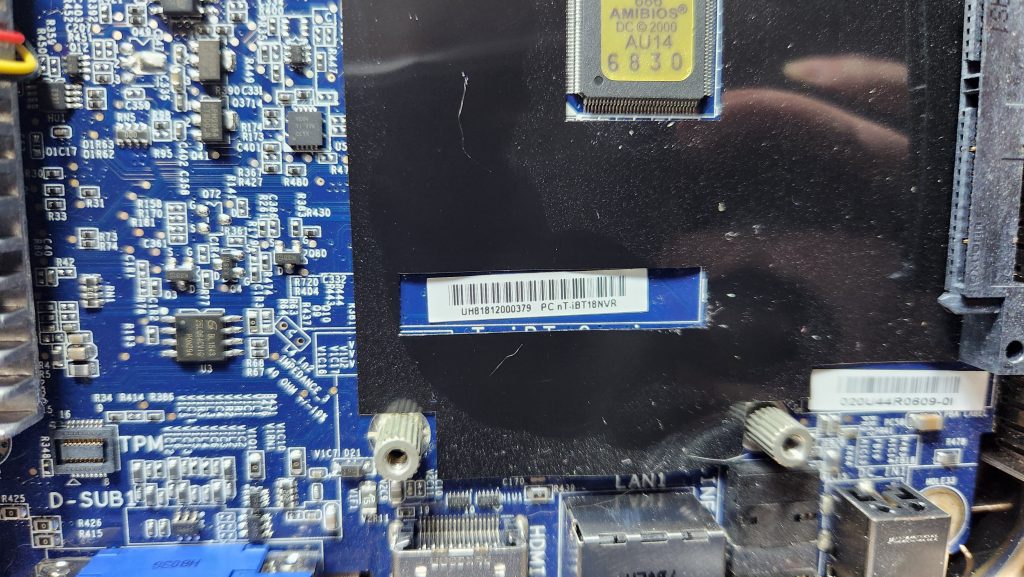
Right away, I gleaned that the product was based on an Intel Atom 64-bit chip, had a MiniPCI Express slot that was unpopulated (and a second one I didn’t find until later), and above all had a generic BIOS that was supposedly somewhat difficult to configure. I later on found this to be accurate, it took me much longer than I’d care to admit to get the thing to PXE boot, but I was ultimately successful.
Hardware Overview
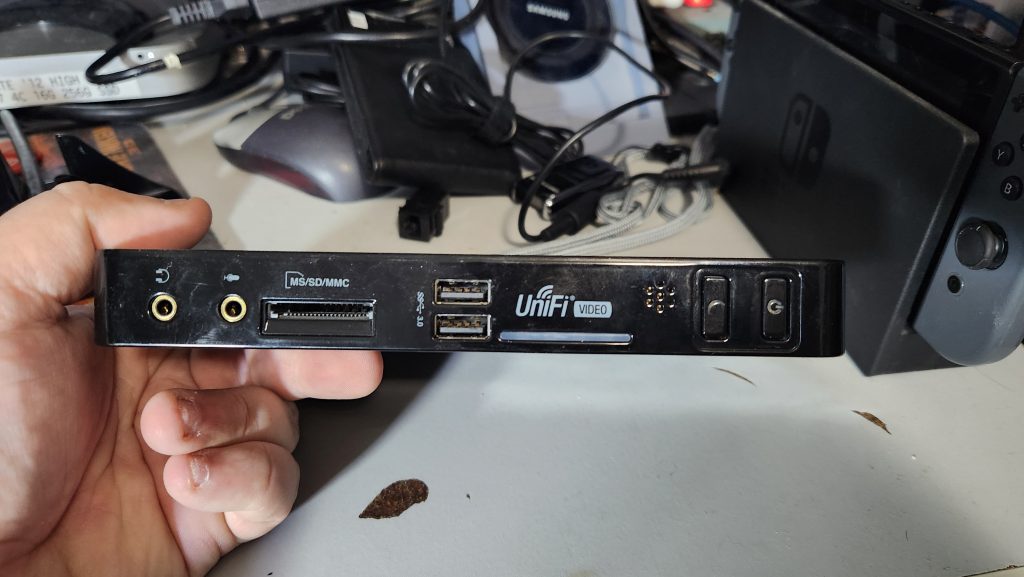
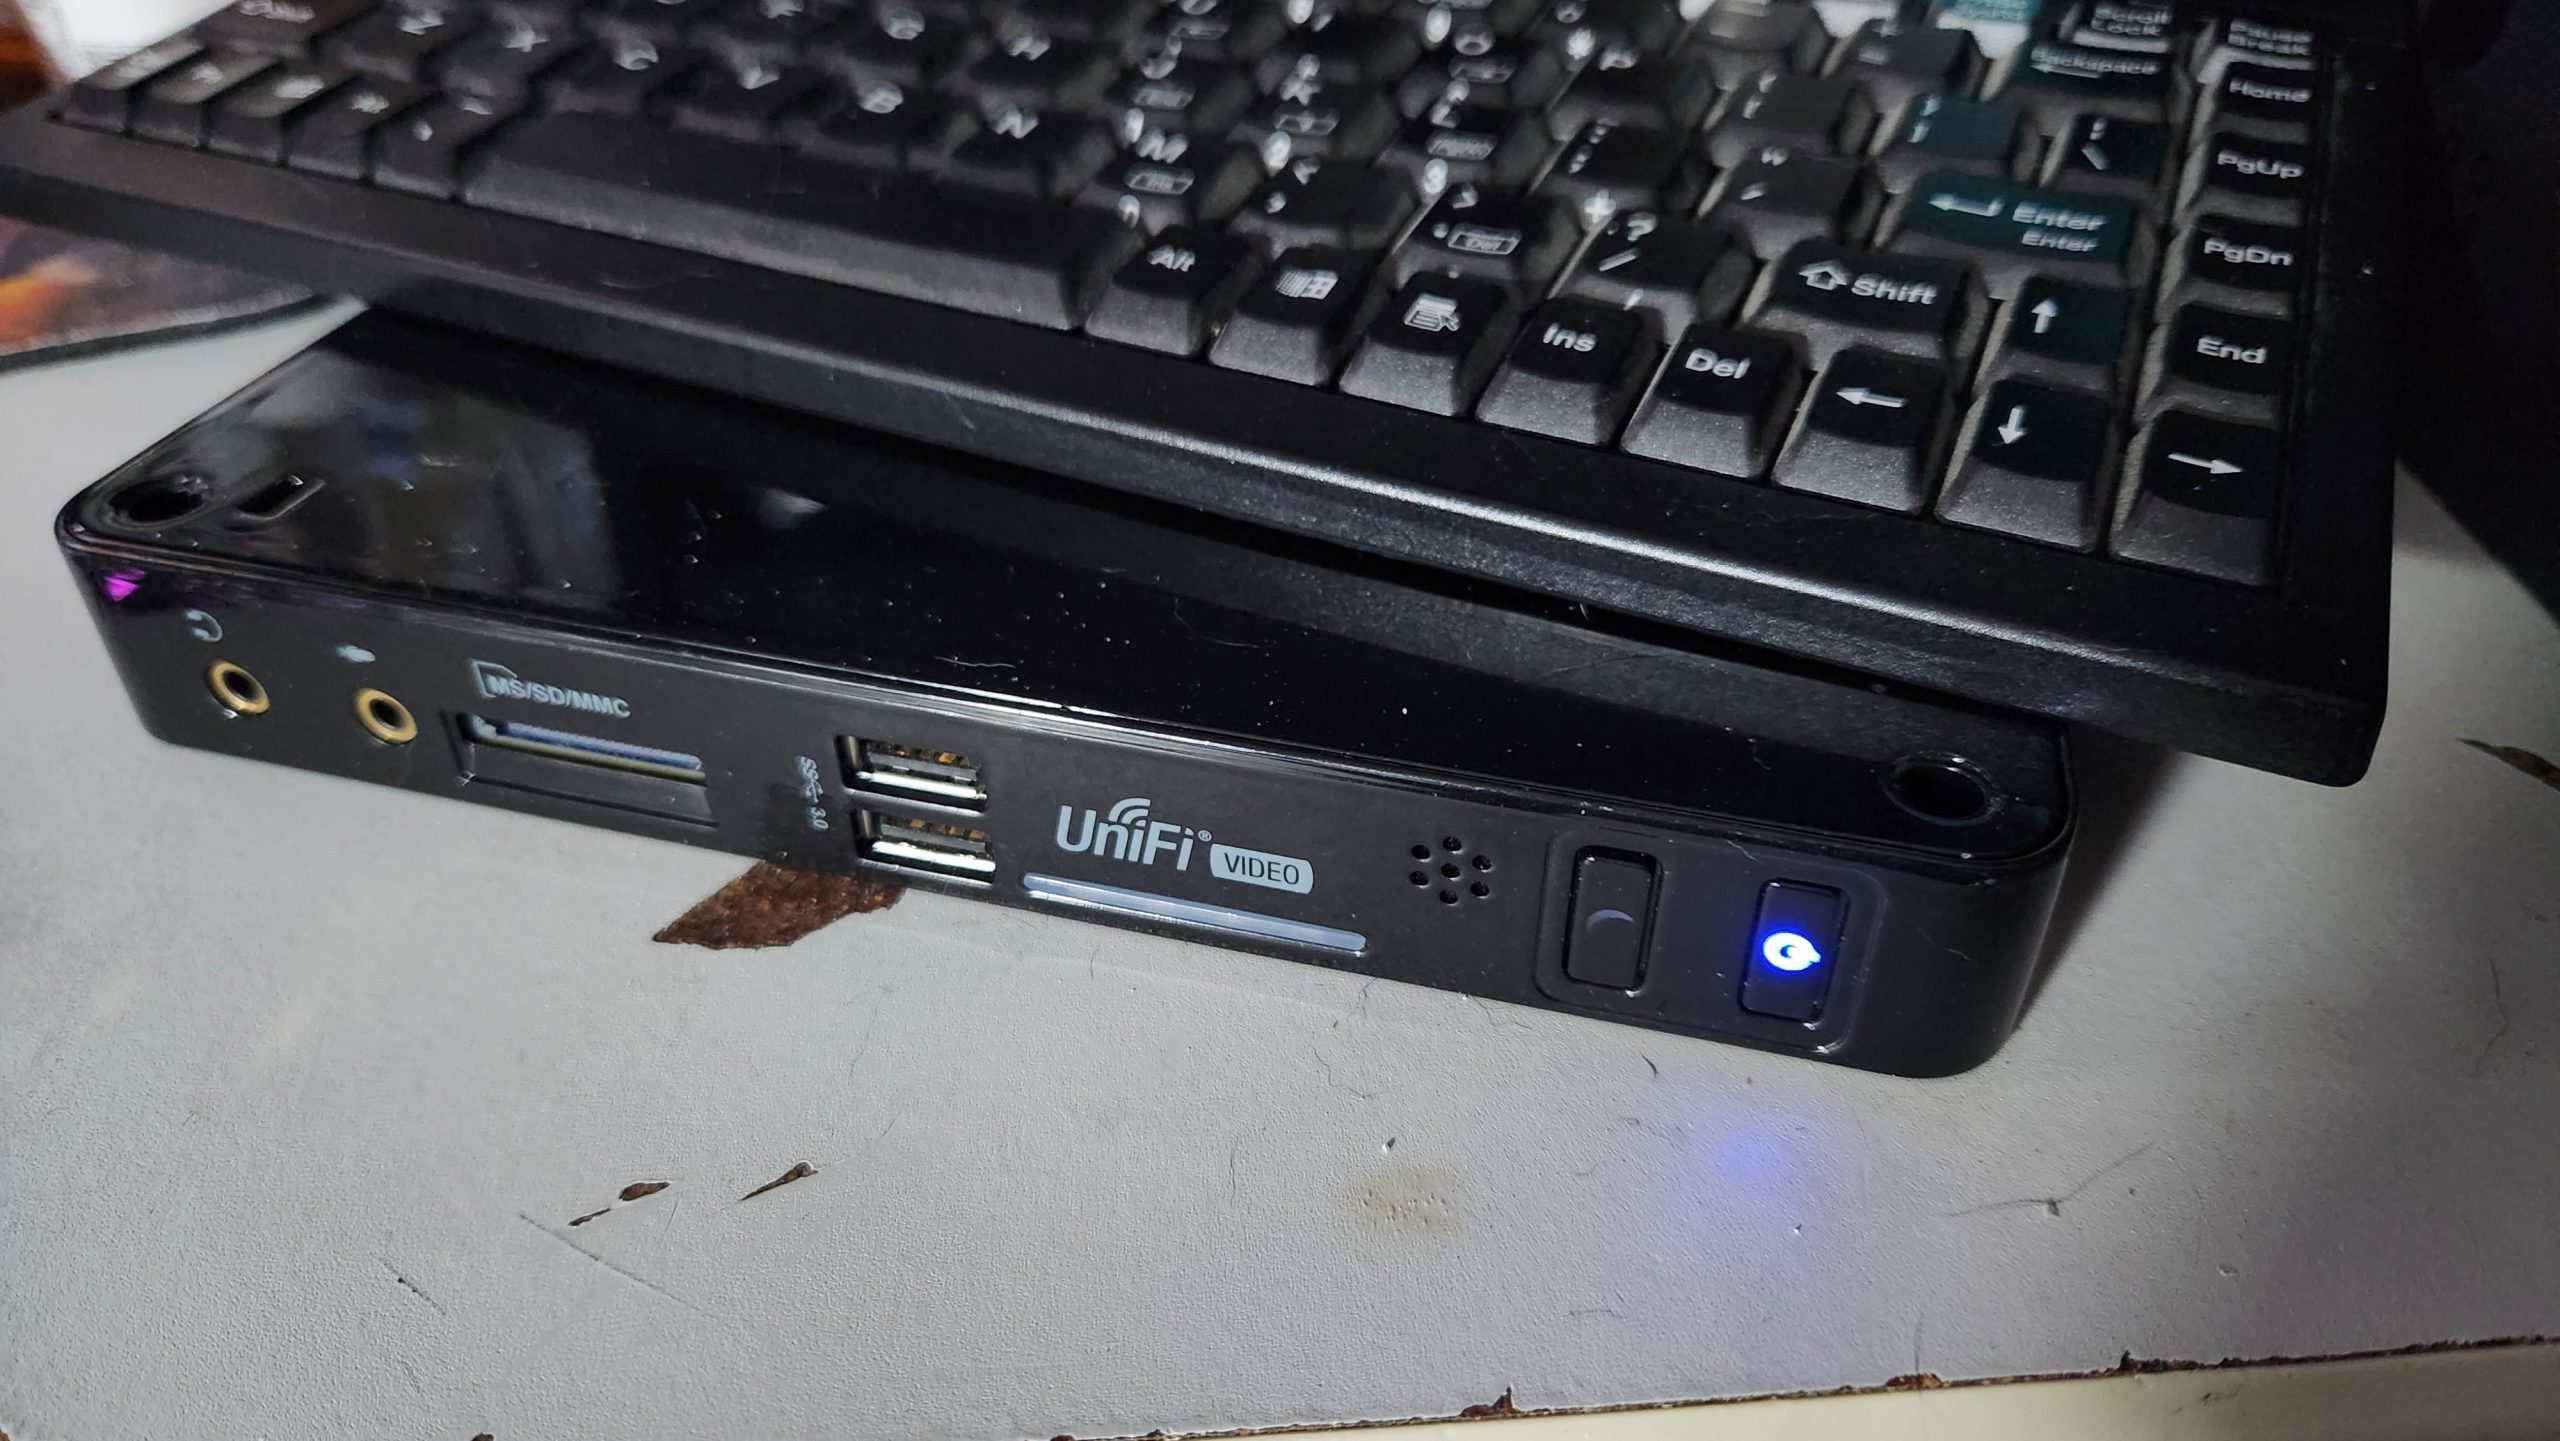
The front of the NVR features a Mic In and Audio Out jacks, an SD/MMC card reader, two USB-3 ports, a tiny speaker, and sleep/power buttons. There is also Unifi’s characteristic blue LED light running along one side of the front panel.
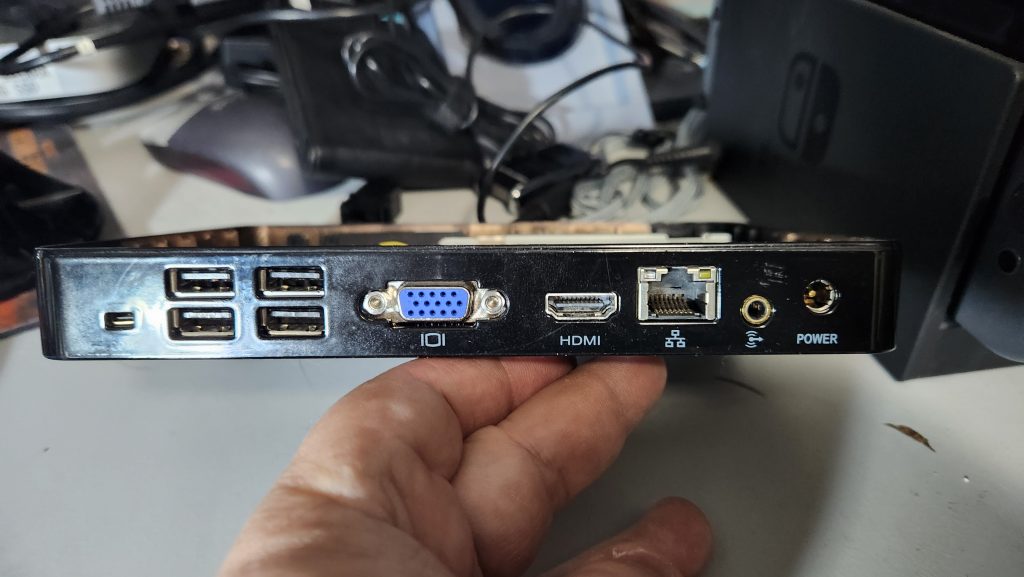
The back of the NVR gives us what appears to be a proprietary serial port (I’m still not sure if this is a USB-serial port or a true -12/+12 RS-232 serial port), four USB-2.0 ports, a VGA port, and an HDMI port. A RJ-45 Gigabit Ethernet port, a Line (audio) out port, and the unit’s power is delivered by a common barrel jack and accompanying power brick. The brick is made by a company called Chicony and has a rated output of 19VDC at 3.42A
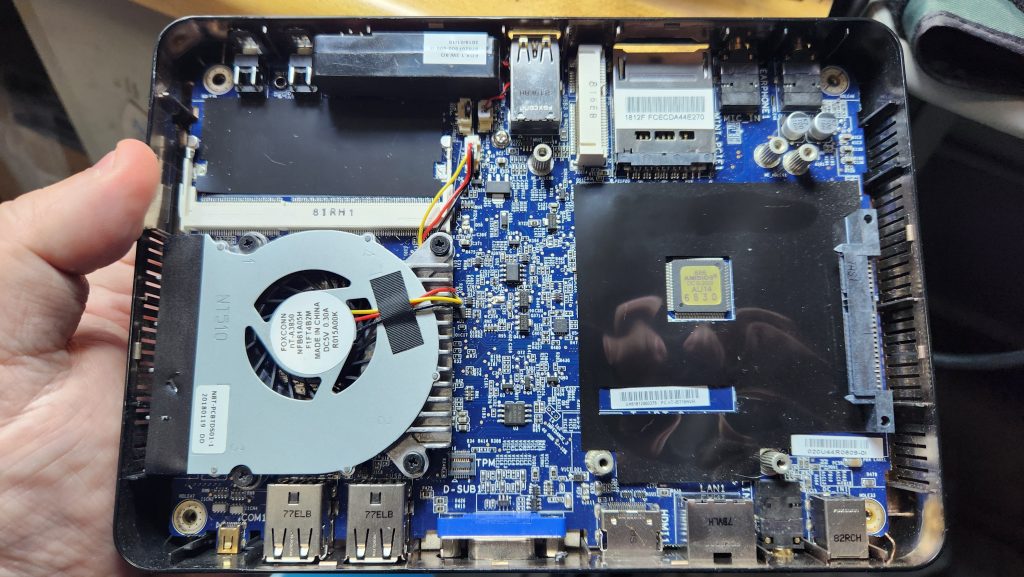
On the inside, we see the factory installed 4GB DDR3 SODIMM, a small jumper (this allows you to select between DDR3 and DDR3L memory), the tiniest speaker I’ve ever seen in a non-phone device, an unpopulated Mini-PCI Express slot, the SATA power and data connector for the built-in hard drive and the AMIBIOS chip.
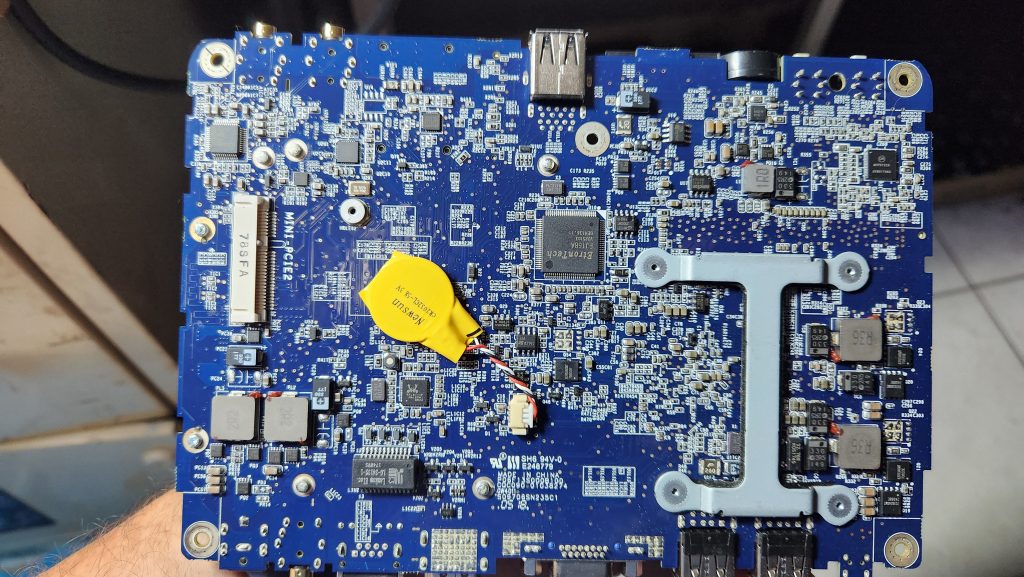
The underside of the mainboard holds one more surprise, namely another Mini-PCI Express slot that didn’t appear anywhere in the manual for this machine. The RTC/BIOS battery is also on this side.
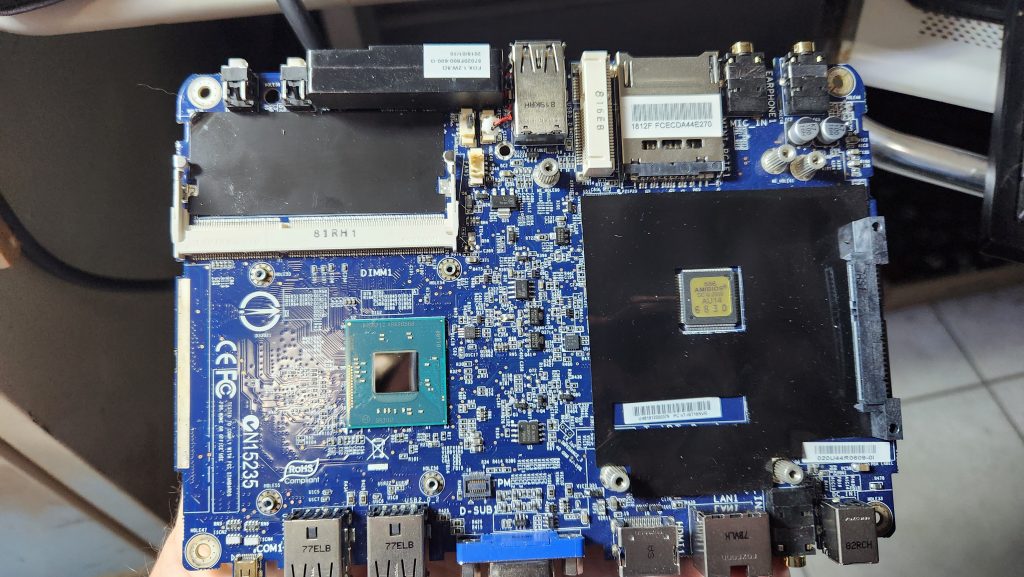
During analysis and disassembly, I decided to re-paste the CPU as it had gotten noticeably warm. Here’s a photo of the CPU die in all its glory.
Hardware Stats
- Processor:
Intel Celeron J1800 @2.4GHz - RAM:
4GB DDR3L (DDR3 available with jumper change)
8GB DDR3L from parts drawer worked without a hitch. - Front panel connectivity:
Audio In, Audio Out (amplified) 3.5″ stereo phono jacks.
MMC/SD card slot (BIOS supported booting, not tested)
2x USB 3.0 ports
Tiny Speaker
ACPI Sleep Button
ACPI Power Button - Rear panel connectivity:
Proprietary serial port using non-standard Mini-HDMI connector??
Four USB 2.0 ports
HDMI, VGA out
Copper RJ-45 Ethernet with Link/Act LEDs
Audio Line Out (unamplified) - Audio:
Intel Atom on-die Audio controller - Ethernet:
Realtek RTL-8169 or similar 1Gbit Ethernet - Storage:
(stock) 2 TB Seagate Barracuda 5400 RPM SATA HDD.
(recommended) SATA SSD (tested with 128GB Crucial SSD) - Other:
- Two functional MiniPCI Express slots (one under motherboard, one on top). Tested with a MiniPCI Express Wireless module I had kicking about, Ubuntu recognized the card instantly and I was able to connect to my WiFi as expected.
- Kensington Lock on side of chassis
Configuration
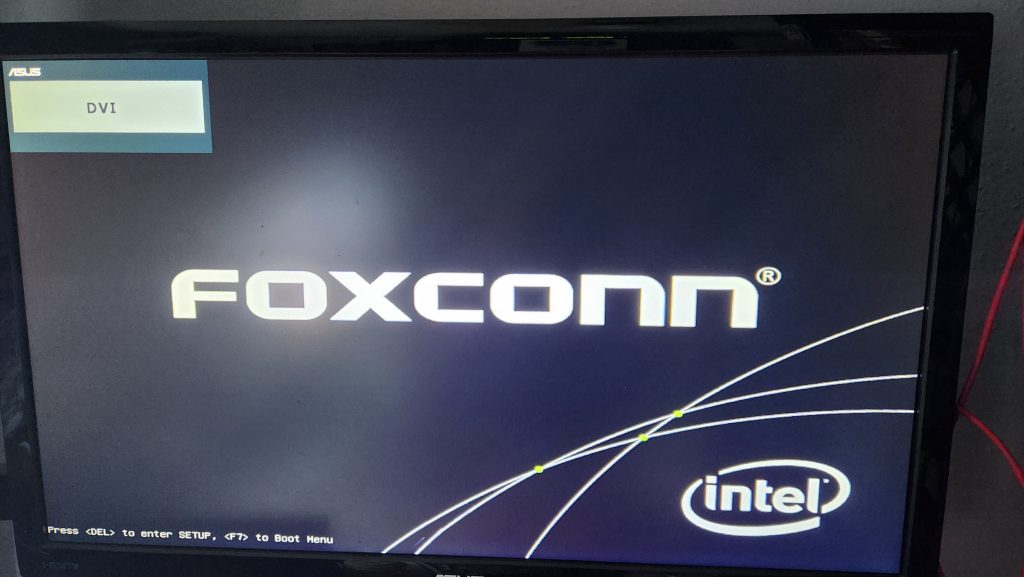
Getting into the BIOS was really easy, just connect a USB keyboard (Note: Use the USB 2.0 ports in the back for keyboard/mouse/OS install media if not PXE booting) and slamming DEL like you would on a typical computer.
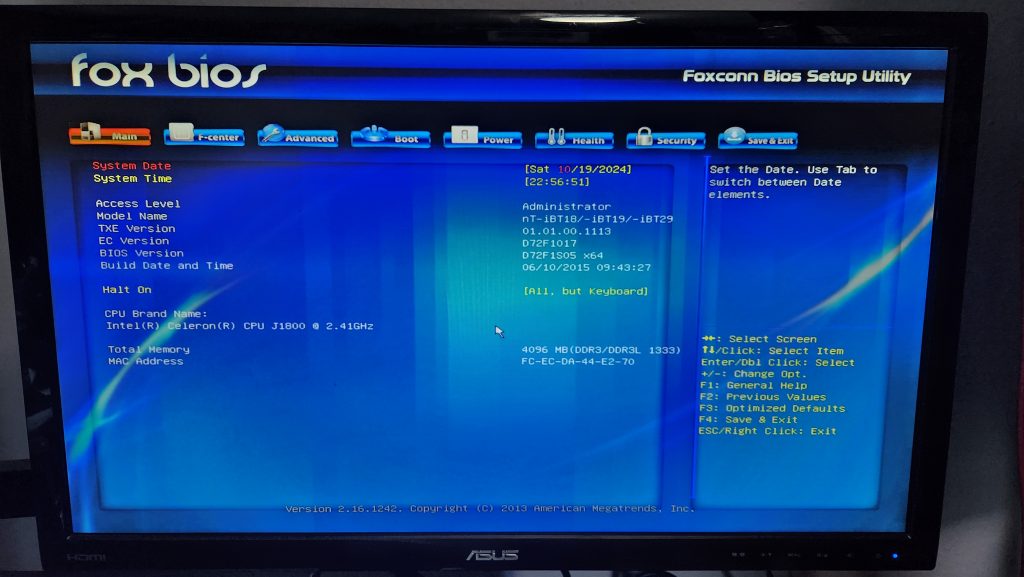
After you successfully get into the BIOS, you can navigate with the mouse or the keyboard and it operates like a typical BIOS configurator does, albeit with pretty graphics. I didn’t really test out the mouse functionality, I’m just a creature of habit. The keyboard was more than adequate for changing options.
Fully functional MiniPCI ports!
I managed to rummage around in one of my parts bins and found a MiniPCI WiFi card and a small pigtail and WiFi antenna to test the two MiniPCI slots. Happily, both of them worked just fine and Ubuntu recognized the WiFi card and allowed me to join the WLAN. If you decide to follow in my footsteps, you will need longer pigtails and better antennas. My antenna was off of an embedded controller project and while it worked okay, I wouldn’t use this specific antenna permanently.
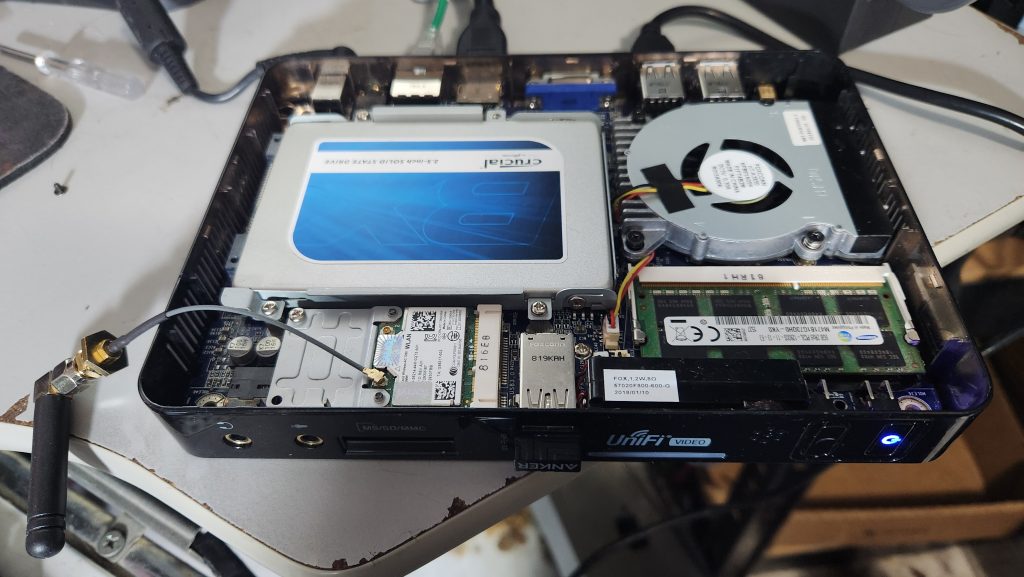
This is the upper MiniPCI Express slot with a slot extender for the WiFi card. If your add-on card is not full-length, you will need to obtain an extender for it. I stole one of the screws off the HDD mount in order to secure the card to the standoff to hold the card in place.
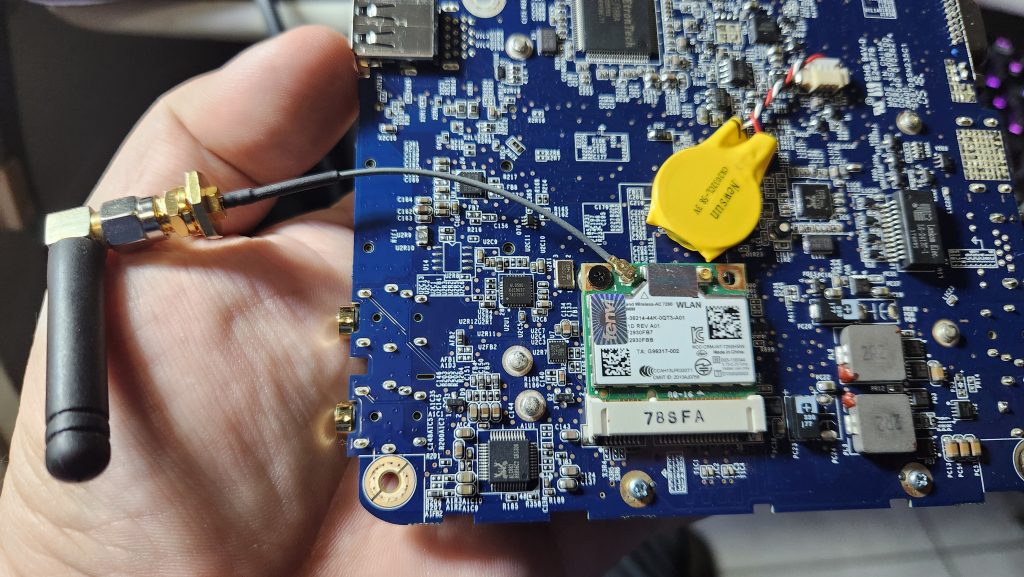
The lower MiniPCI Express card slot is just big enough for the WiFi module, no extender required. I used one of the screws off the extender to mount to the standoff to secure the card in place. The standoff for this MiniPCI Express slot is much smaller pitch and diameter than the standoff on the top-side slot.
Regrettably, I did not have an mSATA SSD to test if the MiniPCI Express slots would use them, but reviews on the NewEgg listing does seem to indicate that it would work. I was unable to test it so your mileage may vary.
PXE Boot changes
As I mentioned before, getting this thing to PXE boot was more complicated than some of the servers I deal with in my real job, so to save you that anguish, I’ve documented the process and the configuration options you need to change.
- When the device boots, hit DEL to get into the BIOS.
- Go to Advanced
- Network Stack – Disabled (this does not disable the NIC, only the UEFI boot)
- Go to Boot
- CSM Configuration
- CSM Support = Enabled
- Boot Option Filter = Legacy Only
- Network = Legacy
- OS Selection = Linux (should already be set to Linux)
- CSM Configuration
- Save changes and Reset
- Go to Advanced
- When you reboot, look for a Realtek prompt that says “Press Shift+F10 to configure” and press those keys to access the Realtek Ethernet Boot Agent configuration.
- Network Boot Protocol = PXE
- Boot Order = PnP/BEV(BBS)
- Hit F4 to save and exit.
- When the device reboots, hit F7 for the BIOS boot menu.
- Select the “Realtek PXE B02 D00” entry and the machine will start PXE boot.
Once you get the options set and the machine reboots again, hit F7 at the Foxconn splash screen to pull up the boot menu. Select the REALTEK NIC to boot from and just sit back while it does its thing.
OS Installation (via PXE)
The install process was largely unremarkable. Ubuntu Focal LTS netboot image recognized the NIC and the hard drive easily. The installation proceeded without any variance or issues. Using the stock hard drive drove the install time through the roof before I finally just killed the installation out of frustration.
Performing the installation with a SSD installed was a much faster and more pleasant experience. This was not due to any fault in the installer, in fact I made sure to install the OS to the SSD using the exact same options as the HDD based installation. The only difference was going from a 5400RPM HDD to a 120GB SSD, a very pronounced difference in speed.
Taking Ubuntu for a test drive
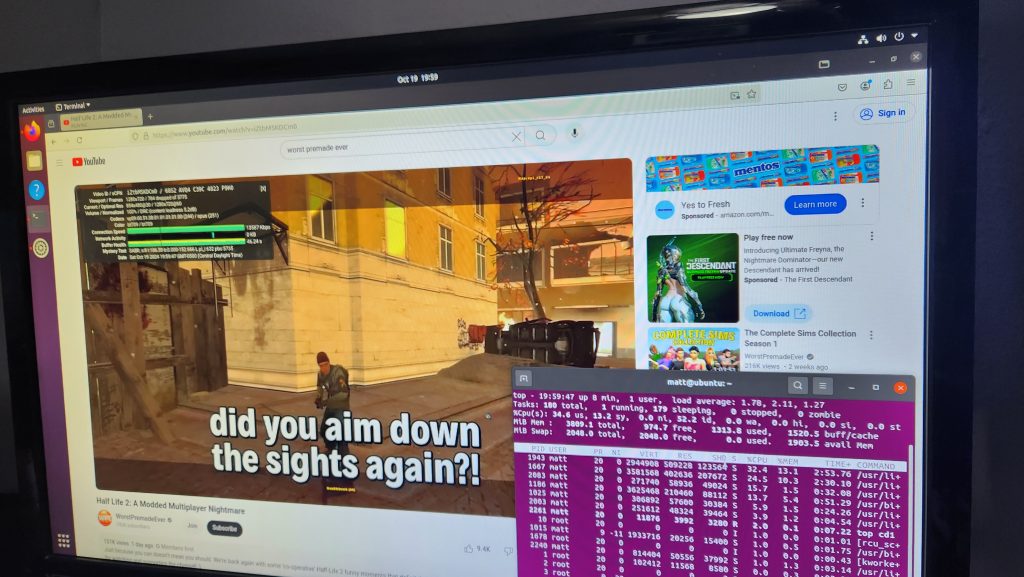
As mentioned before, I started off installing Ubuntu Focal Server LTS (it was already in my PXE environment) and performed a full desktop installation in order to test the graphics components and see what the machine was capable of. The desktop loaded well and for all intents worked decently. I was able to fire up Firefox and start YouTube, but I noticed that the video initially lagged while the audio played. Once Firefox had built up enough of a buffer, video started playing normally but it was definitely not 100% click-to-play. (also, shoutout to Worst Premade Ever, a bunch of fun gamers.)

I also noticed that while playing the video, the load on the machine was higher than I’d like. I don’t think I’ll be using this machine for any rendering projects, but basic office stuff might work better. In my environment, I’ll be using it headless, so putting a desktop environment on it was strictly for a proof of concept.
Changes you want to make ASAP
- Re-paste the CPU.
When I first tried installing Ubuntu, the NVR got really warm even with the case open. The hard drive was uncomfortably warm and the CPU’s blower was discharging very hot air. I shut it down and pulled off the CPU’s heatsink and was greeted by thermal paste that was so ancient, it took me almost ten minutes to soak it off using isopropyl alcohol. It was so fossilized, I had to resort to using a plastic spudger and carefully scraping the “paste” off the CPU die and the heatsink. A tiny dab of thermal compound and the CPU was nice and cold again. - Replace the 5400RPM hard drive!
Installing Ubuntu the first time was a complete pain due to the slow I/O speed of the stock hard drive. For being a network video appliance, I thought the disk I/O would be better, but instead the stock drive is a 5400RPM drive and it definitely feels like it. Replacing it with a SSD would be a significant quality of life improvement. - Replace the RAM with a bigger stick.
With RAM (much like storage and core count), more is better. While I was able to get Ubuntu running in the factory installed 4GB RAM, it definitely felt like it was running in 4GB of RAM. Running Ubuntu with 8GB RAM was a more pleasant experience, but there was still lag from the low power CPU. - Change the BIOS to allocate 512MB VRAM instead of 32MB.
Since the Atom architecture uses the installed RAM as shared between the system and the video adapter, increasing the RAM from 4G to 8G, and increasing the VRAM allocation from 32MB to 512MB improved video responsiveness overall. While the processor still got initially hamstrung by YouTube, it seemed to start playing slightly faster than with the previous 32MB.
First Impressions and Final Thoughts
First Impressions
With the wide variety of connectivity and expansion options, this machine immediately warrants further investigation into the feasibility of repurposing the hardware. The fact that this device has a standardized processor (based on the amd64 architecture) and the fact that the Unifi Video product originally ran on a modified Linux distribution means that putting a general purpose Linux distribution on this machine should be a fairly easy task. Finding that the hardware is not hamstrung by any proprietary nonsense (with the exception being the hardware serial port on the back) means that common off-the-shelf components should be plug and play. The six USB ports give a lot of opportunity for peripheral connectivity and the VGA and HDMI ports being able to be operated simultaneously also open up possible uses for multiple display purposes.
Final Thoughts
After playing around with the hardware for a bit, it makes me wonder how this machine was so successful when operated as it was originally intended. The Intel Atom CPU is a significant bottleneck due to it’s low core count and low clock frequency and when compounded with the anemic 4GB RAM and 5400RPM hard drive really causes suspicion on how capable this machine was for acting as an NVR for a security solution. The low grade processor and the slow hard drive made installing a general purpose Linux distribution on it rather painful to the point that I had to stop the installation and immediately upgrade the storage to a faster SATA SSD.
After the SSD was upgraded, the machine appeared to function better and IO was improved, but it still felt like it was running on a very slow processor. Youtube videos took several seconds to initially load, at which time the audio for the selected video kept playing while the video remained frozen in place. After a few seconds of buffering, the video played as normal. Other applications were similarly slow to load initially, but worked better after loading.
Given the current constraints of the CPU but the flexibility of the hardware overall, I’d say this would make a good low-power server for script work or basic automated tasks. This machine is no speed demon, but it will be adequate for some basic tasks that don’t require a lot of horsepower to get done. Other users have suggested uses in digital signage, or as a heads up console for various messaging and notification boards and for that it sounds like the hardware would be a good fit given its portability.
Happy hacking!
FIRESTORM_v1
Hi,
I’ve just found the same device in our storage room. So your description was really useful on what this can be used for.
Many thanks for it!