Using Clonezilla to make your HD bigger
by firestorm_v1 on Dec.29, 2009, under How-To's, Linux, Software
(Ok, innuendo aside…)
Well, the Christmas/Yule break is over with and it’s time to get cracking. If you were like me this holiday season, you were either placed in the position if needing to do a hard drive upgrade for someone else or you received a new hard drive of your own that warrants upgrading. The CloneZilla site didn’t contain very clear instructions for what to do so I decided to write this howto documenting the process. In this howto, I will cover using the free application “CloneZilla” to perform a hard drive upgrade on a test installation of Windows XP from 4GB to a 10GB drive.
Foreword:
Of course, it’s Christmastime/Yule and I took pity on my girlfriend’s laptop which had two things going against it. Firstly, it had vista and secondly it had a 80GB hard drive. I’m not sure why Toshiba in their infinite wisdom only gave it a 80GB HD, but they did. Thankfully I had just completed an upgrade to another machine and had a 250GB hard drive to spare. So I set out to upgrade her hard drive and fix at least one of the two reasons that her laptop was evil.
A lot of research turned up various solutions however none of them were very viable or were free. Most of them required two hard drives in one computer and although her laptop did have the solder traces for the second SATA hard drive connector I’m not about to take a soldering iron to her laptop, she’d kill me. So with that said and with my head still attached to my body, I kept searching. I found a Live CD application called CloneZilla which had Cloning abilities much like a certain Symantic product but was free and didn’t require extensive configuration to get to work. Unfortunately the instructions were not very clear at all and after spending a nailbiting hour trying to start the copy, I finally got it done and decided to document the process in case someone else got stuck in the same need that I did.
In this HOWTO, I will be upgrading a 4GB Virtual Disk in VMware with that of a 10GB Virtual disk. Aside from the fact that it’s all virtualized, this is indeed a true upgrade and is exactly how you would do an upgrade for a real “physical” computer.
Prerequisites
You will need the following items for a successful transfer:
- The CloneZilla CD available from http://clonezilla.org/ I’m using Clonezilla Live version 1.2.2-31.
- A Windows computer that has a hard drive with free space greater than the size of the original disk you are upgrading. (If you’re upgrading a 40GB HD, then this machine must have at least 40GB free on it.) This will be the WIndows Image Server.
- The hard drive to upgrade
- A working network where your machine to upgrade can browse the other windows machine’s file shares. (This is CRITICAL, as the other machine will store your disk image for the upgrade.)
- A case of beer, rum, vodka, etc…
The “other machine” in #2 will be the image server. This is where CloneCD will copy the files to that make up the disk image. I will review how to set up a fileshare in Windows for this however any machine that does SMB filesharing can work. There are other options available however SMB sharing works the easiest.
Process Overview
In this HOWTO, we will be upgrading a Windows XP Virtual Machine with a 4GB HD to a 10 GB HD. Although I’m using VMware Server to capture the screenshots, this same method can be used to upgrade almost any home Windows computer. I’m not sure if Windows 7 or if Windows Server 200* will work but in all theory they should too. The process for upgrading will go something like this:
- Examine the existing system to upgrade and get existing disk size
- Configure Windows Image Server to accomodate images
- Boot system to upgrade with Clonezilla, configure and start copy process
- Swap out hard drives, reboot with Clonezilla and configure to start the restore process
- Take whatever OS steps are needed to take advantage of new space. (OS Dependent)
Step 1: Examine the existing system
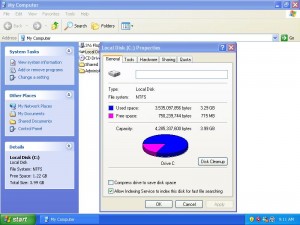
This one’s easy. Just fire up the existing machine and take a look at the hard drive. In my example system, there’s only one hard drive. All I did in this screenshot was open My Computer and Right Click on Local Disk C: then go to “Properties”:
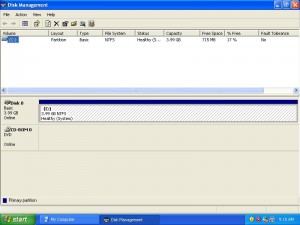
If a machine has more than one partition, you might need to go to Local Disk Managment (Start -> Run -> diskmgmt.msc ) Here’s a screenshot of what our test system looks like through Disk managment:
Based on this information and according to disk managment, the minimum free space we need on our windows image server will be 4GB. I would recommend an extra GB just in case. Now that we know how big the disk is and how much space we need, let’s get the image server configured.
Step 2: Configuration of the Windows image server
This section covers how to set up the Windows Image server for the new image. We will need to create a new directory for the image files, create a new user on the server and then assign that user with full permissions to that directory over the network.
Step 2a: Add the user
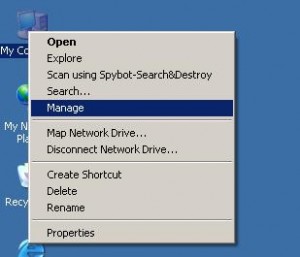
Right click on the My Computer Icon and go to Manage
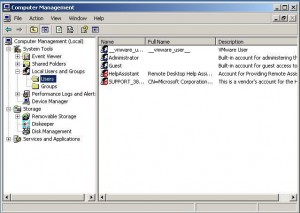
This will bring up the Computer Managment Console. Click on the “+” next to “Users and Groups”, then click on Users. This will show you all of the currently installed users on the system and should resemble something like below:
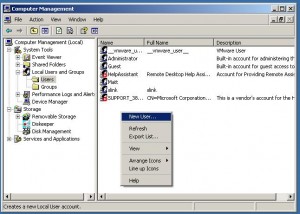
Right click on the right side of the window and click on “New User…”
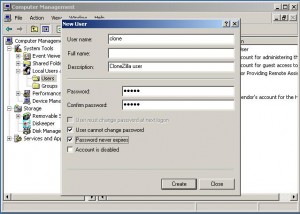
In the “New User” dialog box that pops up, you want to set the following options: Username = clone Description = CloneZilla user”, Password = clone “User Cannot Change Password” and “Password Never Expires” should both be checked. “Account Is Disabled” and “User Must Change password at next login” should be cleared (unchecked). See below for the reference screenshot:
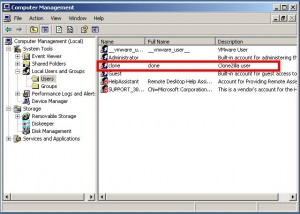
Click “Create” and then click “Close”. You can see the new user in the screenshot below highlighted in a red box.
Step 2B: Configure the file share and add the user to the share.
Now that we have the user in the system, we need to create the file share. In this case, I’m using a directory inside my “D:” drive to store the images. MAKE SURE THAT WHERE YOU STORE YOUR IMAGES EXCEEDS THE CAPACITY OF THE DRIVE TO BE COPIED! In our case, we found that the system to upgrade is 4GB, so we need at least a 5GB disk to copy to.
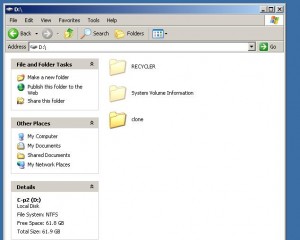
Go ahead and locate a suitable place for your clone files. In this case “D:” is completely blank except for the system files that Windows generates for partitions. Right click and create a new folder called “clone”
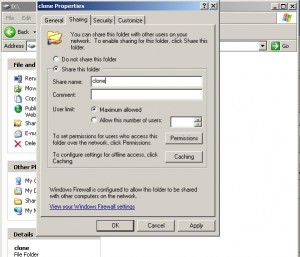
Right click on the clone folder and go to “Sharing and Security”. Fill out the form and name the share “Clone” however don’t click OK just yet.
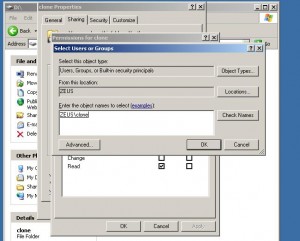
We need to make sure that the “clone” user we created earlier has full access permissions to this directory. Click on “Permissions” and add the “clone” user to the directory with full permissions.To do this, click “Add” on the Permissions screen, type in “clone”, type in “Check Names”, then hit OK. In my case, it added “ZEUS\clone” which is still correct. ZEUS is the name of the image server.
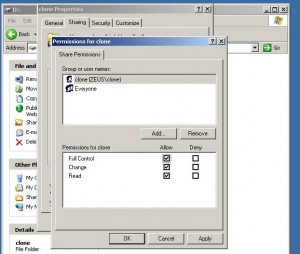
Now, I have “clone” added to the permissions window and set the proper access permissions for that username as shown below. Go ahead and click OK to the Permissions window and to the sharing properties window.
If all works well, you should see a “waiter’s hand” appear below the directory icon. This hand icon shows that this directory is shared across the network and is available for access be it read-only or read/write. At this point, we are done with configuring the server. We’ve added the “clone” user to the server, added a suitable “clone” directory for Clonezilla to store and retrieve the disk image’s files from and we have added proper permissions to the directory for the clone user.
Step 2c: Test it out!
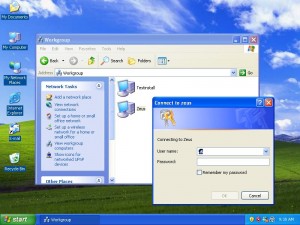
Go back to our initial machine to upgrade. You should be able to find your image server by browsing “My Network Places”. In my case, the image server was named “zeus” and showed up only after I clicked on “View Workgroup Computers” as shown in this screenshot. You should get a similar password prompt when you try to access your image server:
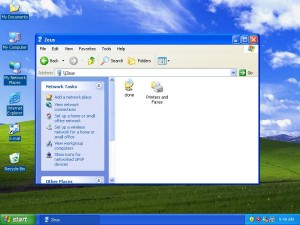
Login with the user credentials we created in 2A, (username and password of “clone”) and you should be presented with a directory listing like the one shown below:
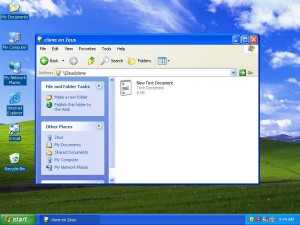
We have proven that our clone user works, but let’s test to make sure that we can write to it. Double click on the clone share and try to create a text file. (Right Click -> New -> Text File) If it creates a “New Text File.txt” like shown below, this means that your permissions are correct and you’re good to go. If you get any kind of read/write error, check your permissions on the image server.
If you’ve gotten this far, then congratulations, you’re ready to do the copy. Go ahead and shut down the system you’re upgrading and get ready for the next step:
Step 3: Boot system to upgrade with Clonezilla, configure and start copy process
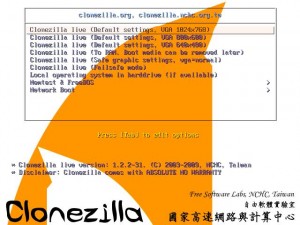
Go ahead and boot the upgrade system with the CloneZilla CD. You will be presented with a boot menu like the one below. Go ahead and select the first menu option “Clonezilla live (Default Settings, VGA 1024×768)”:
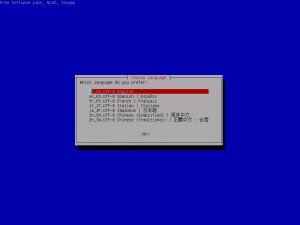
It will then take a bit and flash a lot of linux based stuff at you. Finally you should be directed to choose a language. The prompt should look like this now:
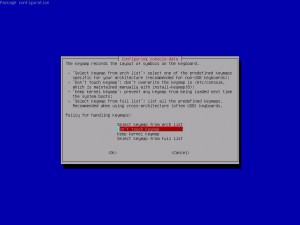
You will then get a prompt about keymaps. When in doubt, just leave it alone.
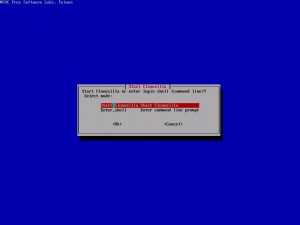
More console stuff will flash past and then you’ll get the prompt you’ve been waiting for. Unless you’re very very advanced, you will only use the “Start Clonezilla” menu option:
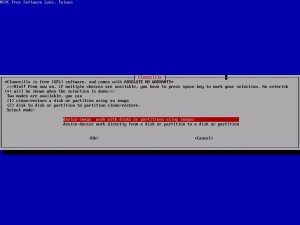
Now we’re at a screen that is really confusing. We want to work with the disks but we also want to work with images to create partitions. In this instance, we’re going from the disk to an image file on our windows image server then back to disk again. In our instance, we will need to use option 1, Device-Image.
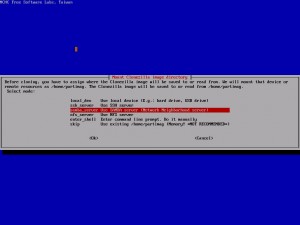
In this screen, it’s asking where are we storing the image. The answer is “samba/Network Neighborhood server” however if we needed to, we could use a local SSH server as well.
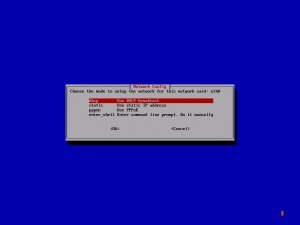
Now it’s asking how we connect to our network. 99% of the time this will be “dhcp” as you will know if you’re using static for anything. If you have a Linksys router or similar router/firewall device, select DHCP.
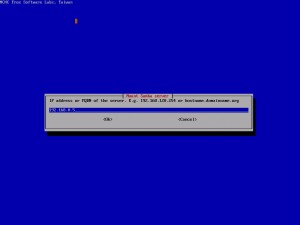
After you get a successful IP address, CloneZilla needs to know what IP address your windows image server is. In my example, the windows image server (zeus) is 192.168.0.5.
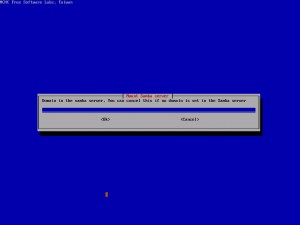
Next, Clonezilla needs to ask for the Domain. If you are not using a domain, then tab to “Cancel” and hit Enter. I’m not using a domain here, so I just hit Cancel. This is reserved for corporate networks that use a special server called a Domain Controller.
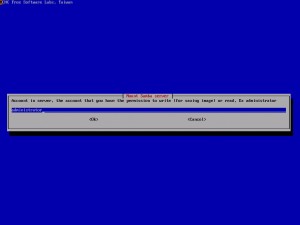
Now Clonezilla needs to know the username of the account to connect to the server. This will be the username and password you created in Step 2 above. For our test, we put clone as the username
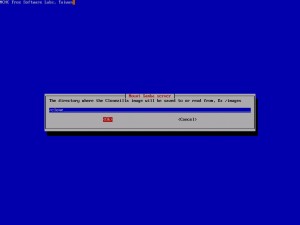
Clonezilla prompts us for the location (the share name) of where to put the images. In the steps above, we used “clone” as the share name. This is the location we give to Clonezilla so it can store its images. Be sure to leave the leading / at the beginning of the directory name.
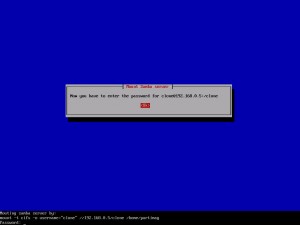
Next, it’s time for the password. When prompted, type in the password. Although this prompt looks different than the others, this is not a sign that something has gone wrong so relax.
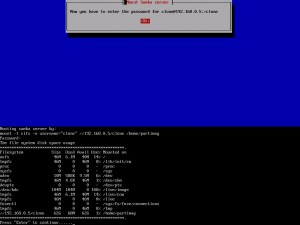
If all of the information you entered was correct, you will get a filesystem mount listing similar to what is shown here. If something went wrong, you’ll get an error message outlining the possible error and a chance to re-enter the information. If it doesn’t give you the option to reenter or something isn’t right, just hit the power switch.. In this screenshot, you can see that the last line starting with //192.168.0.5…… is our image server and that it is mounted correctly!
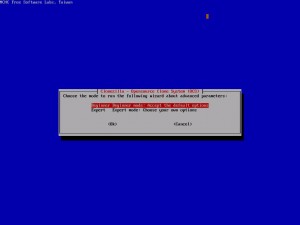
Since we have successfully mounted our image storage as part of the liveCD’s filesystem, it’s time to start the copy. You will be prompted for which mode to run Clonezilla in. I recommend the “Beginner” method as it makes the entire copy easy.
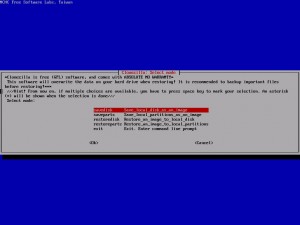
Now we are prompted on what to do. We will start off by selecting the first option “savedisk” as we want to save the existing disk to the image server. We will use “restoredisk” later.
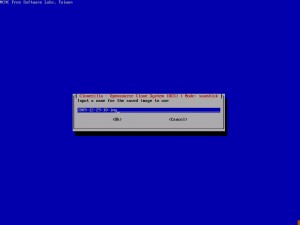
If you are wanting to manage multiple images, you have the option to name them with something more descriptive . For now, I selected the default name which is in YYYY-MM-DD-HH format.
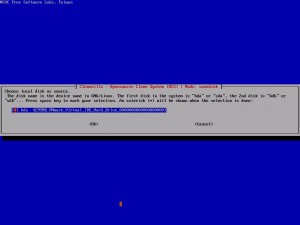
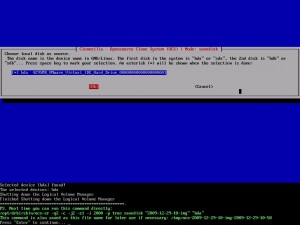
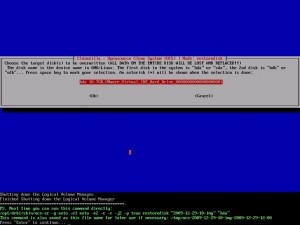
Now we tell CloneCD which hard drive to copy. In most systems, there will only be one hard drive, however make sure you have the right one if not. You can select and deselect by using the space bar to toggle the asterisk. An asterisk in the brackets “[*]” means that the item is selected however the brackets alone “[ ]” means the item is deselected.
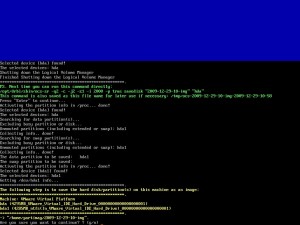
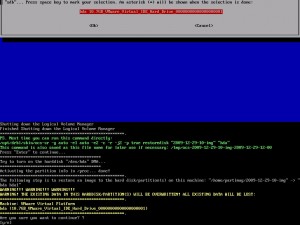
One last word from Clonezilla before it starts copying. If we wanted to run in console mode (which I will never do. 😛 ) we could do it all with one command. Just hit enter to get past this prompt and start the copying. This also tells us that it has successfully found and identified the drive we selected to copy and shut down Linux’s logical volume manager to allow direct access to the disk to copy.
One last final confirmation that the information we have entered is correct. Remember that making this image does NOT make any filesystem changes to the original hard drive and in fact, no changes to the original hard drive are ever made. This is especially good in case you need to revert your upgrade, you can just swap out hard drives and you’re back where you started from. If everything is correct in the yellow text, go ahead and type “Y” and hit enter. This will start the copy process.
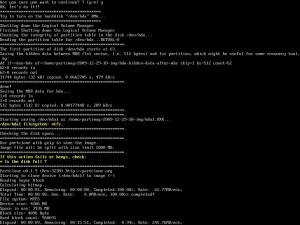
Finally, the copy begins. Go ahead and grab a soda, watch a movie or something as this will take a considerable amount of time depending on the size of your hard drive. In my test example transferring a 4GB hard drive, it took roughly 16 minutes to complete. My girlfriend’s 80GB hard drive took several hours to copy.
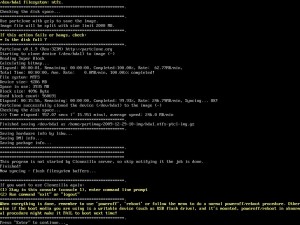
At last, the file copy is complete and we are ready to exit Clonezilla:
Hit “Enter” then hit 0 for power off. After a few seconds, you will get the message “Please remove the disc, close the tray (if any) and press Enter to continue. Hit enter and your computer should now turn off. Go ahead and perform the drive swap now. We’re halfway there!
Step 4: Swap out hard drives, reboot with Clonezilla and configure to start the restore process
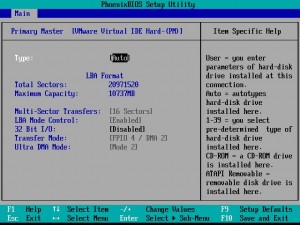
Before continuing, you want to make sure that your hard drive is recognized by the BIOS. In my test setup, I have swapped out the original 4GB VMware disk with a 10GB Vmware disk and it is displayed in the BIOS here:
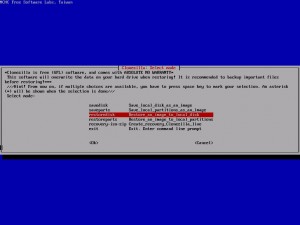
Just like before, we will use the same options to create the disk image to restore the disk image. Use all of the instructions in step 2 all the way until you get to the Mode screen shown below. Instead of selecting “savedisk” like we did at the last screen, we want to use “restoredisk” instead.
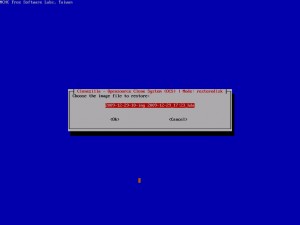
Now we select the image to restore to disk. Since we only have one image listed, this is the one we use.
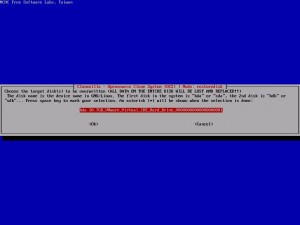
Once we have selected a viable image, now we are prompted to select the target device. Again, it’s the only hard drive, so it’s the device we want:
Just like before, it will tell us that we can rerun this restore using a single command from command mode:
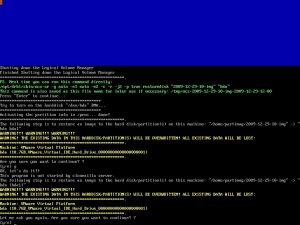
This time, the warning needs to be read. This is just prior to performing any filesystem changes to the new hard drive. If you are absolutely sure, go ahead and answer “y” to start the restore process:
One last time, it asks to make sure you are sure about your restore decision. If everything is correct, answer “Y”.
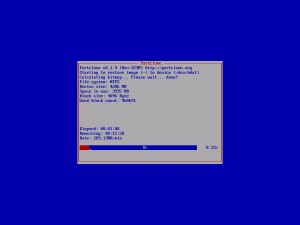
A good bit of text will go across the screen and you will ultimately end up at a partclone screen like the one below. The text that you saw earlier is the partition application creating the destination partition for the image. Once created, partclone takes over and starts restoring the data from the image. Again, grab another drink, (I’ve got a margarita) and wait a few hours for the image to restore.
Once the restore process completes, you will be prompted to power off. Hit Enter, select option 1 and remove the CD from the CDROM tray when prompted.
Once the system reboots, it should automatically start Windows. If it does, you’re ready to go to the last step!
Step 5: Take whatever OS steps are needed to take advantage of new space. (OS Dependent)
Now these steps depend on which OS you’re using. At this point, we have made an image of the old drive, saved that image to another server and restored it to a new blank drive that is larger than the original image. As shown earlier, we have a 10GB disk in our machine to upgrade and we have just restored our 4GB image to it. We have successfully booted windows however our disk properties show that the disk image is still 4GB. (Ignore the disk space used, as I was shutting down the disk image it decided to install 50 windows updates…)
Here is the same shot of the disk managment window after the upgrade/restore. You can see that it is a 10GB drive, but is still a 4GB partition.
Attention Vista Users!!: If you are running Windows Vista, you can use Disk Managment to expand the disk size. All you have to do is right click on the C: partition shown above then go to “Expand Disk”. This will walk you through the process for expanding the disk to take up the entire space of your new drive. I’ll add new instructions to this as soon as my girlfriend lets me use her laptop again.
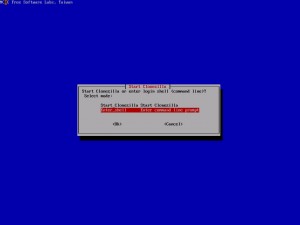
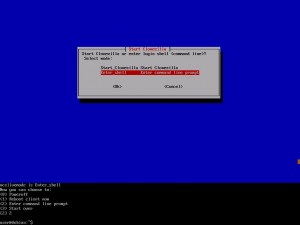
For those of you not running Vista, keep reading. At this point, we have validated that our restored image works properly. Now all we need to do is resize the partition to take up the entire disk. Thankfully clonezilla has a solution for that. Reboot using the CloneZilla CD. Answer the same questions regarding keymap like you did before except instead of starting clonezilla, we want to enter the Clonezilla shell.
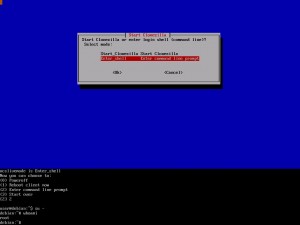
You will get dropped to a text prompt that presents you with several options. You will want to select option 2, “Enter Command Line Prompt”. Once done, you will be at a user@debian prompt as shown here:
We are going to use the utility “ntfsresize” in order to increase the size of the partition that we restored to the new disk but first we need more information. Before we get started, run the command “su –” to get to the “root” user. This will allow us to modify the drive’s layout. At the above menu prompt, hit the digit 2 for “Enter command line prompt” and then type “su –” at the “user@debian ~$” prompt. The screen should then look like the screen below.
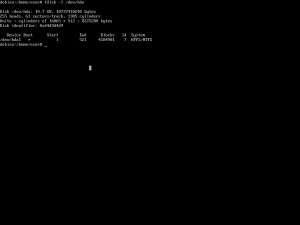
Then we will use “fdisk” to get the disk’s full size. I ran the command “fdisk -l /dev/hda” to get the drive size:
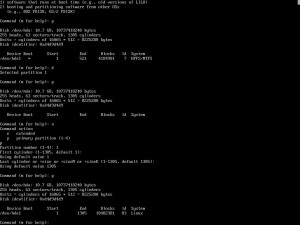
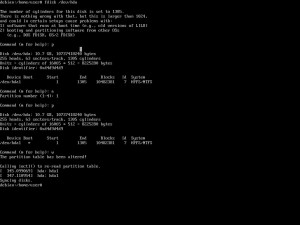
This is important as we are going to delete the partition, then recreate the partition. First off let’s run “fdisk /dev/hda” and use “p” to get the partition size. In this screen, we see that the partition starts at 1 and ends at 521. We want it to extend to the rest of the disk. We’ll start off by using “d” to delete the partition, (FDISK will assume partition 1) and then create a New partition using the defaults as shown below (Use the commands “N” for New partition, “P” for primary partition, and give it partition number 1). Once we have created the new partition, we will need to set the “System” back to HPFS/NTFS otherwise NTFSresize won’t work properly. Below is the FDISK responses to these commands we’ve used so far.
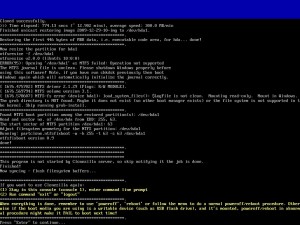
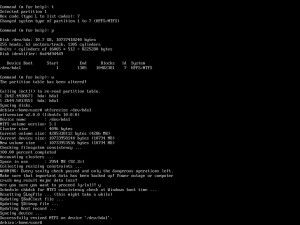
Now that we’ve create the new partition, we have to reset it’s type. Use the “t” command and set it to ID of 7 (HPFS/NTFS) and then use “a” to toggle it’s bootable state. We want to be able to boot into Windows after all. Use the “w” command to write the partition data to the hard drive and exit. Now that we have reset the partition size, we can use NTFSResize to expand the NTFS data. Cross your fingers and run “ntfsresize /dev/hda” and it should produce output like what is shown here. When run with no additional parameters, NTFSResize should automatically find the beginning and the end of the partition and expand the existing NTFS data to take the entire drive as shown:
With our newly resized partition we should be able to reboot and get into our Windows environment. To do that, just type “reboot” and remove the CD when prompted. Note: The above screenshot missed me using the “a” and “w” commands to toggle bootable status. Here’s what it looks like:
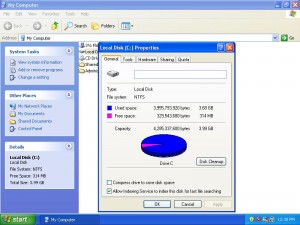
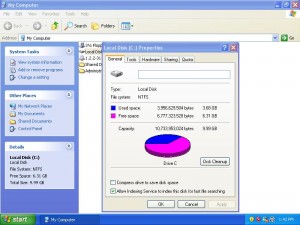
Ok, so now that I have fixed my grievous error, it’s time to reboot. With any luck, your computer will boot Windows and go staight into a chkdsk environment. THIS IS OK!, this means that Windows sees the new partition size and that it needs to run a consistency check. DO NOT PANIC!!! Let the consistency check run, then it will reboot your computer again. After it boots for the second time, it might prompt to restart because it found new hardware (the new HD). This is OK as well. Let the windows installation reboot. Once it has completed rebooting for the third time, get your disk properties by right clicking on C: drive and going to Properties. As shown below, we have successfully resized our partition to take up the entire drive and are now sitting at 10GB (well 9.99GB according to windows.):
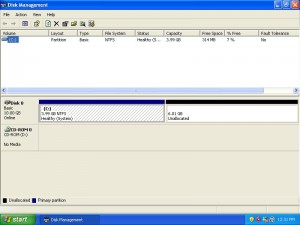
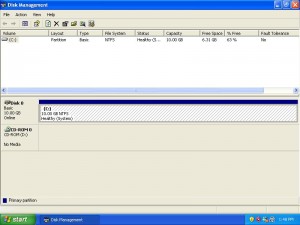
Here is a screenshot from Windows XP’s Disk managment to show that we used the entire drive:
At this point, we have successfully finished the migration! Here’s a rundown of what all we did in this step:
- We restored the partition to the new drive
- We verified that the restore worked properly when booted into, e.g windows booted properly and without errors.
- We then deleted the existing partition, recreated a new partition and then set the partition type and bootable flag using Linux’s FDISK on the Clonezilla CD.
- We used NTFSResize to expand the NTFS data to take up the entire new resized partition.
- We then booted into Windows and let it do a filesystem check
- When Windows was restarted again, we validated through Properties and “Disk Management” that the new disk was used fully.
This was the most complex part of the migration as CloneZilla only goes about 90% of the way to migrating to a new, larger hard drive. I hope that this howto provides the last 10% that you are looking for. With this howto and a copy of CloneZilla, you can then upgrade almost ANY hard drive that Linux supports and can even go from IDE to SATA or SATA to IDE if need be.
Afterword:
I sincerely hope that this helps someone out there trying to make sense of a hard drive upgrade. I know that I learned a lot about partitions and filesystem structures by attempting an upgrade of my girlfriend’s laptop and this Windows XP installation. I know that working with partitions is a scary thing as you could potentially lose data but keep in mind that your “original” hard drive still has all the original data on it, as does the image that was stored on the windows image server.
The items in this howto can potentially be a life saver especially if you have a family member that keeps messing their computer up. You could create an image after you have performed all needed windows updates and software installations and then retain it for if something goes wrong. Rather than having to manually do an OS reload, you can run though this HOWTO in an hour and have their system up and running again, fully patched and ready to go.
I hope that you had a great Christmas/Yule with your family and look forward to keep going strong in 2010. As always, thank you for your continued patronage, you are always welcome here at YourWarrantyIsVoid.com!
FIRESTORM_v1
January 23rd, 2010 on 7:31 pm
Hello!
Great howto! I ran into the same problem, because I need to upgrade my IBM T60 from 60 GB HDD to 500 GB HDD. But I don’t have a server here, just an external HDD which should work as well. But I am still not sure what will happen to my external drive – will CloneZilla just save the image on that drive as NTFS-formated image, so that the other files that are on my external drive won’t get lost?
I would be glad I you could help me out with an answer.
Kind regards (to you and your girlfriend as well 😉
Martin
January 25th, 2010 on 10:20 am
Hello Martin:
Thank you for your kind words. My girlfriend was very excited when she went from a 40GB to a 250GB hard drive overnight.
You don’t have to use a “server” in the sense of the word, any windows based computer with a hard drive bigger than your original HD will work fine. I just used the words “image server” to distinguish between the windows XP machine I was putting the image (zeus) and the test installation I was upgrading.
As far as using an external drive, I’m really not sure. I would hate to give you bad advice but I haven’t tried this method. As long as your external drive is capable of being written to by the linux OS that makes up the Clonezilla CD you shouldn’t have a problem.
I would try the first half of the how-to first, make your image copy to your external hard drive. That way, if you can’t get the image to the external drive, you will know full on that you won’t be able to proceed without having made any changes to your original hard drive. This is another reason why I suggested using another windows machine as you won’t have to worry about compatibility or filesystems or anything like that.
If that doesn’t work, but you do have another windows machine, try using the external drive on the other machine and use it to temporarily act as the image server. This will save you from having to go through a lot of extra effort to get the copy done.
I wish you the best of luck in your migration.
FIRESTORM_v1
January 28th, 2010 on 6:10 am
Hello again,
just want to tell you that I succseded. I took an external HDD (USB2), created a primary partition to be sure _where_ the image will be created and no data would damaged. I used “savedisk” to let CloneZilla write an image there. Than I swapped HDD’s, used the option “restoredisk” to write the data on the new disk and things were just fine.
And after all that has been written about the long time it would take to create a image, I was quite surprised about the speed: it only took about 30 minutes to create the image of my 60 GB HDD and another 30 minutes to write the image to the new HDD (500 GB).
To change the size of the partiton on the new HDD I just installed the program Partition Magic to get more allocatable space. Done. 🙂
Kind regards,
Martin
January 28th, 2010 on 5:36 pm
Hello again Martin:
I am so very happy that you were able to complete your upgrade! Thank you for letting me know that your external drive method was a success.
After reading about your drive copy time, I can understand why your copy didn’ take very long at all. A standard USB2 hard drive has about a 480Mbps transfer rate which is almost 5 times a standard network connection. With your estimate, had you been doing it over the network, it would have taken you about 2 1/2 to 3 hours to transfer it all.
I think that your use of the external drive is definately a life saver (ans a timesaver too).
I do thank you for writing back and hope you have fun with your upgraded hard drive.
FIRESTORM_v1
April 30th, 2010 on 12:10 pm
I am attempting to resize the hard drive and am at the point where I enter the command ‘su -‘ to get to the root. After typing in su – , I get a password prompt and have tried every possible one I know and keep getting ‘su: authentication failure’. Do you have any suggestions?
May 3rd, 2010 on 11:24 pm
Hello Kevin:
It’s been a while so I went back through the process and did not get prompted for a password or get an authentication error when I su’ed to root. What version of clonezilla are you using? I’d like to see if I could replicate and I might be able to advise you better.
You may be able to achieve the same thing by running “sudo bash”. As long as “whoami” shows root then you should ok. Can you post some more details about your configuration so I can do more research?
As always, thank you for taking the time to comment on my article!
FIRESTORM_v1
May 4th, 2010 on 2:37 pm
I ran into the same issue when using “su -“. My work around was using “sudo sh -“.
Just f.y.i
November 6th, 2010 on 4:45 pm
Thanks for the info, all went fine.
November 16th, 2010 on 8:27 pm
Hey Mike!
Glad to hear it worked for you!
FIRESTORM_v1
December 15th, 2011 on 12:51 pm
Thanks for the advice! I’ve been wrestling with clonezilla for about 2 weeks, and finally got it working except for the partition resize part, and now i know how to do that! Some stuff I learned that may be of value:
A USB drive totally works, you can clone as a drive or an image (i didn’t do images, i just did drives). Best of all is one of those universal drive adaptors or docks that allow you to plug a bare drive into an external usb port. i highly recommend one of these for $20 or $30 is you regularly get called upon by loved ones to fix their shit 🙂
with one of these you can do the swap to the new hard drive, hook the old one up with the adaptor, directly clone drive to drive (not partition to partition or it won’t boot) and then resize the partition and you are done.
and i’d like to say that microsoft licensing sucks! the fact that the license that i bought was for sp1 and i needed sp3 to get the install to work means the last machine that i worked on is now stuck with vista and is min spec on ram for win7.
January 3rd, 2012 on 9:36 pm
Have been reading this to work out the resize thing again, although current Clonezilla has an expert mode which has a resize option in it and worked in the end. Get Clonezilla to create your partitions, I did mine manually and it wouldn’t boot.
With regard to your license being for SP1 and you needing SP3, what you may be able to do is get your original SP1 disk and using nlite add service packs to it and create yourself a new install disk with sp3 already on it, but requiring your original license key. M$ uses an assortment of keys (full product, oem, upgrade) and you need to right type of media to use with the right key. I do a new nlite install for every license key type I need to reinstall.
January 12th, 2012 on 9:07 pm
Hello Rob:
The only thing I can think of is not to forget to set the bootable flag! (I think it’s x because b is for BSD label?) When I was making this howto, I forgot it and had to reboot into Clonezilla only to toggle bootable on the partition after expanding it.
I’ve slipstreamed Windows XPSP3 into a couple of install disks before, but I couldn’t find any of them when I made the test rig for the screenshots. I’ll have to take a look at the nlite utility and see if it might make things easier.
Happy Hacking!
FIRESTORM_v1
April 12th, 2013 on 12:58 am
Can’t even say how much this post helped. Thanks you so much for the walkthrough. We were stuck on the partition size issue with the new drive. This did the trick!