Hardware Pr0n: Sylvania “netbook” from CVS
by firestorm_v1 on Jan.08, 2011, under Embedded devices, Hardware, Hardware Pr0n, Investigative Dissassembly, Windows
Well, the annual gift-giving season has drawn to a close and now we are left with retailers trying to get rid of all that extra stuff that thy have left over in their inventories. Of course as a hardware geek, I’m always on the look out for another great hack. While at my CVS I came across a Sylvania netbook device for under $100. Even better, I got mine as an open box for only $30 making it an awesome find. Read further to discover what this little beastie’s hiding under its hood.
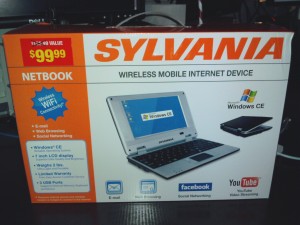
The device touts itself as a “Wireless mobile internet device” and from the box, the stats are a little on the slim side. It runs Windows CE, has several USB ports, an SD card slot and a mic and headphone jack. The manager warned me to not expect a fast performing machine and that since it was an open box, CVS would not be able to take a return especially at the price I was being given. I told him that I plan on modding the device and would not need to return it. He told me that although these devices were popular, many people were downright irate when they brought them back because of the device’s supposed horrible operability. I was still on the fence and told him that there’s a good chance I could do something with it and he sold it to me for $30 just to get rid of it and avoid having to ship it back to corporate.
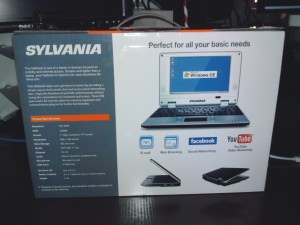
The box is small and light and shows the device as well as some specs on the back. I could see where the uninformed may be led to believe that this was a full blown laptop or netbook PC and purchase this instead thinking they got a bargain. But, since I was out for hardware and not necessarily for a netbook, I knew immediately what I was getting into. Let’s take a deeper look.
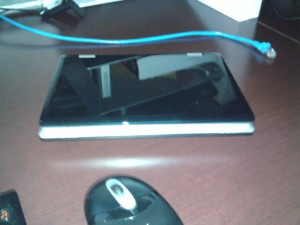
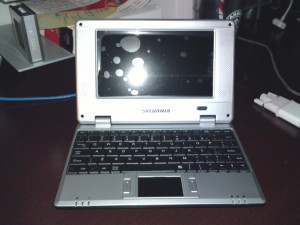
This image really doesn’t do much justice. This thing is SMALL.
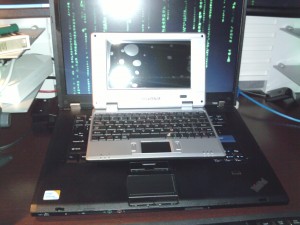
Here’s another pic of it sitting on my work computer. It’s roughly 1/3rd the weight, 1/3rd the height and 1/3rd the length of my lenovo T500. Aside from the smallness of the device, I was impressed at how sturdy the device was. It’s plastic but the consruction itself was solid.
The keyboard is very small on this device however after typing on it for a while (this article was written on the netbook, minus image adds and minor editing) it quickly became comfortable, although don’t make any plans on speedtyping any time soon.
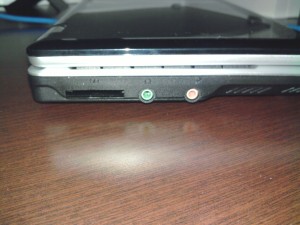
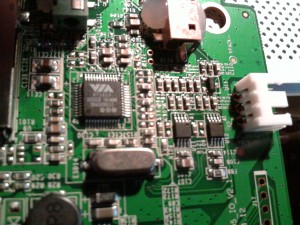
On the left side of the device, you will find the mic and speaker jacks as well as the SD card slot for expansion storage. The audio is powered by a VIA VT1613 audio codec.
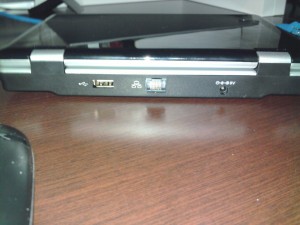
The back of the device has a wired Ethernet jack, a USB port and the 9VDC power port. Nothing too special here although I would have preferred an Ethernet jack with status LEDs. (first mod, maybe?)
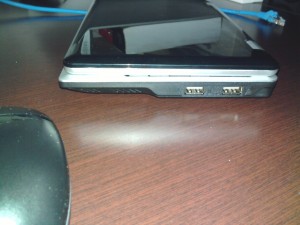
The right side has two more USB ports designated by icons as for a mouse and keyboard however my keydrive worked in all three ports without a hitch.
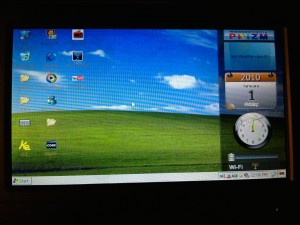
Keeping in mind that the device runs Windows CE, I fired up the stock software. It booted quickly in under 5sec to this screen. I was able to configure it to my network and it ran quickly however I did notice that it had a problem with getting a DHCP address. I statically set it up and everything worked out of the box via corded connectivity. There is an update (will post an update soon) that fixes this and many other issues. Since this article is primarily intended to focus on the hardware, I won’t go into the OS details here.
Now let’s crack the case open and take a look at what’s inside.
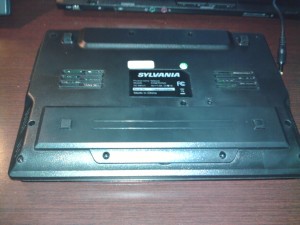
On the bottom of the device, there are 11 visible screw holes. The 12th is hidden under the white “Windows CE” tag and will also need to be removed.
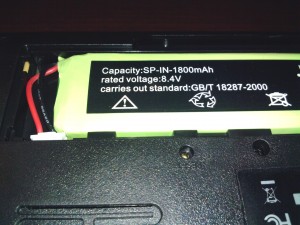
Once you remove the two screws in front of the bulge (foreground of last photo), you can remove the battery cover exposing the small battery pack. I have no idea if this is an LiIon pack or NiMH or just plain NiCD. Disconnect the two leads and remove the battery. Remove all remaining screws.
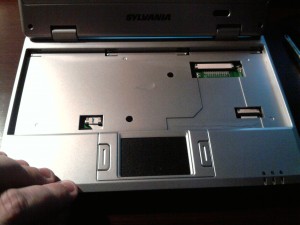
At the top of the keyboard, there are four tabs that hold the keyboard down. Push them in gently and then gently disconnect the keyboard ribbon cable from the mainboard.
Once the keyboard is removed, you will see two smaller openings with ribbons. Disconnect the left one as it goes to the trackpad. Tilt the screen all the way back and you will feel it lock into position. (No, you didn’t break it.) At this point, you can carefully remove the silver bezel from the black base. Now that the bezel’s gone, disconnect the right ribbon cable from the front of the mainboard. This is the LEDs for power and keyboard indicators as well as the left and right buttons for the trackpad. Also next to the right ribbon cable, there is a single screw. Remove it as well as the four screws holding down the hinges to the monitor and this will free up the mainboard. Do not attept to disconnect the two ribbons going into the display housing. The right ribbon is the USB WiFi module which is hand soldered and the other is the ribbon which carries the video signal and is glued to the mainboard.
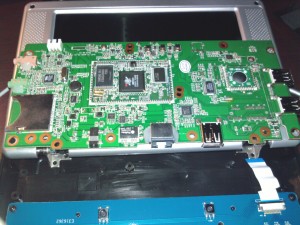
Now that the beastie’s guts are on display, let’s take a look.
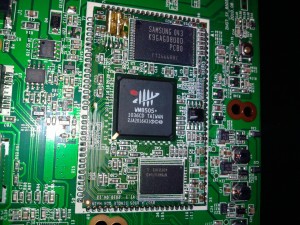
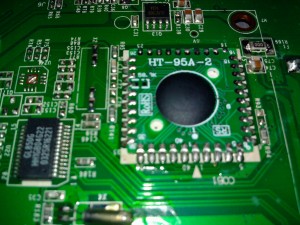
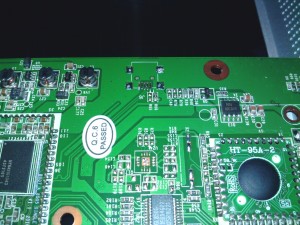
The entire device is powered by a VIA WM8505 SOC with a 2GB flash chip and 128MB RAM. Those extra pins have got to be used for something fun…
As mentioned earlier, a VT1613 Audio codec provides sound.
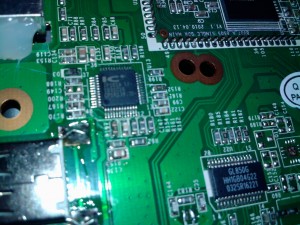
An IC IP101A chip provides us the 10/100 networking.
The feared epoxy blob, in this case appears to be the keyboard controller.
What do we have here? An unpopulated header with two wires that run straight from the SOC to the header. Perhaps this is a 3.3v serial port?
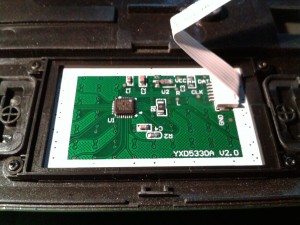
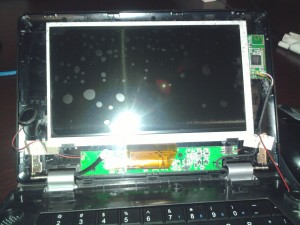
This is the touchpad from the bottom. It is a Cypress CY8C214 and ironically enough is also the controller Apple uses in their Ipods. Now that we’ve disassembled the base unit, it’s time to take a look at what’s under the display bezel. You can get at the screws holding the display bezel together by removing the four black rubber stops at the corners and the screws that lie beneath them. Once removed, the bezel is easily separated by the use of a spudger or small common screwdriver. Once revealed, you can see the display, the display controller board and power switch, the two tiny speakers and the wifi card in the top right hand corner.
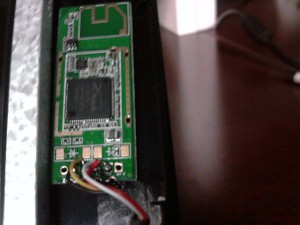
Now, I’ve seen all kinds of weirdness when it comes to the internals of laptops however this one had me floored. The wifi card was not a “card” but more like a USB dongle that had the connector ripped off and replaced by a long cable to the mainboard. The downside is that this is a very cheap move on the part of the manufacturer but the upside is that you can pretty much replace this USB dongle with one of your liking later on. It appears that the stock card is a Ralink RT2070L chip and should be well supported in Linux.
In Summary…
So after spending a couple of days working on it, I was able to locate a firmware update for the Windows CE device. This update fixes the DHCP issue that previously required me to set a static IP for wifi and for ethernet connectivity. There were some noticeable speed improvements to the device. I have been able to get Debian Linux to boot off an SD card on the device and also have managed to get the onboard Ethernet to work. I have also been able to get the device to start a blackbox X session and installed Iceweasel however the speed for page loads and views is very slow so performance will need to be tuned. Once I have it tuned properly and performance is decent, I’ll post the updated image to the site so you can download and enjoy.
All in all, I think this is an excellent find at the $30 I paid for it. It is comprable to the Dockstars I have but even at $100 retail it’s got a lot of potential to make it worth the cash. Just be sure to download and install the Windows CE update as soon as you get it. This will help you avoid a lot of headache later on trying to get the thing to talk to your LAN. As soon as I have more resources, I’ll post a followup article with links for downloading the updates as well as the linux images.
Just in case you missed it, let’s go over the details:
- Display: HL 070 TN92 – Unknown Manufacturer – 800×480 May be TFT?
- Battery: Unknown Metal, 1800mAh 8.4v
- Charger: 9VDC, 1500mA positive tip.
- System Processor: WonderMedia WM8505+ (linux identifies as an ARM936EJ-S rev 5), unknown speed. Research points anywhere from 200MHz to 600MHz.
- System RAM: 128MB SDRAM, unknown manufacturer. Chip number: NY64X161043
- System Flash: 2GB cumulative (WinCE partitions 500MB for system and 1.5G for storage) – Samsung K9GAG08U0
- SD expansion port
- Audio: VIA1613 codec
- Ethernet: 10/100 provided by ICIP101A
- Stock OS: Windows CE 6.0
If you’ve done any mods to your netbook, post a comment! There’s a lot of “reviews” but no real modifications yet to speak of. Hopefully this cheap starter will open up some good ideas.
Happy Hacking!
FIRESTORM_v1

December 2nd, 2011 on 2:55 am
I have a sylvania netbook, from CVS. Need to have a OS on an SD Card (BOOT READY,) easy to put on card. Please advise. I tried android 1.5, and it failed to boot all the way. I need a good OS that EVERYONE Likes, and the actual files ALL THE FILES for making a boot SD and the OS, please. Thanks.
-Alex
December 6th, 2011 on 4:24 am
Hello Alex:
Are you sure that you have the same netbook? The Sylvania netbook uses u-boot which looks for a text file that contains the parameters necessary to boot from. The fatpart.tgz linked in the article contains one such example. When you modify the text file, there is a binary that you also have to run so that the text file is converted into something that u-boot understands and will parse. It’s not as simple as “here’s an image, have fun” as u-boot does not care about partitions, media or even whether or not you’re using flash memory. It sounds like the u-boot encoded text file is missing from your installation.
Good luck!
FIRESTORM_v1
December 18th, 2011 on 11:37 am
Hey, I was trying to do this late at night last night. I worked 12hrs and tried to do it half sleep. I was tired. I read this morning the instructions and I found that I had to remove the CE sticker to get to that screw for the keyboard. Your directions were right on the money. I just over looked that part, thanks alot.
-Demetrius
December 25th, 2011 on 3:21 am
Hi, thanks for your instructions. I had to open my device to access the serial port (4 pin header, next to the battery connector labeled with 3P3V TXD RXD GND).
The Unpopulated header you speak of, looks like an USB port.
Greetings, Rik.
January 12th, 2012 on 9:44 pm
Hello Rik:
Good to know. My serial port was not marked although after looking at the unpopulated header, you’re right. It does appear to resemble a USB port. I’ll have to take it apart again and play around with it again.
Thanks for the info!
FIRESTORM_v1
January 13th, 2012 on 2:52 pm
>The fatpart.tgz linked in the article contains one
>such example.
I can’t find the link. Will you post more about getting Linux to run on the Sylvania?
February 3rd, 2012 on 5:35 am
Can both d flash memory & d physical SDRAM memory b upgraded or replaced&it doesnt av an hard disk,ow can 1 store/save large files e.g >=500MB file.PLS nid info/reply
February 20th, 2012 on 11:23 pm
have you run intpo low battery my daughtr left it on but we have not even attempted to use yet
April 20th, 2012 on 9:51 am
Hello Christine:
I don’t use my Sylvania very much anymore however the last time I fired it up, it was sitting in my desk drawer and wouldn’t come on until I plugged it in to power. I had it connected for about an hour and then turned it on and left it running for the rest of the day. The charging circuit is not very advanced so it will take time to recharge. I recommend leaving it plugged in overnight so that it will be ready to go in the morning.
Good luck!
FIRESTORM_v1
April 20th, 2012 on 10:00 am
Hello Salia:
The flash and the SDRAM can not be upgraded. They are soldered to the SOC inside of the unit. I would recommend using an external USB drive for storage of any frequently accessed material.
Good Luck!
FIRESTORM_v1
April 20th, 2012 on 10:15 am
Hello pohaire:
You will want to check out my revisited post about the Sylvania Netbook: http://www.yourwarrantyisvoid.com/2011/07/25/cvs-netbook-revisited/. That post has all the information you will need in regards to running Linux on the Sylvania.
Good luck!
FIRESTORM_v1
May 12th, 2012 on 10:10 pm
I am trying to find a new battery for a Sylvania Netbook that I bought as a gift. Where can I find one at? Thanks!
August 3rd, 2012 on 5:56 pm
I have a couple of these, and have in fact taken one of the wifi cards out, attached it to a USB cable, and plugged it into my regular computer. With some Googling I found drivers from Ralink, installed them, and had a second wireless connection! Also, at one time I also had another cheap China-made device with an identical wifi setup. Same exact card, meaning three simultaneous internet connections 🙂
August 23rd, 2012 on 11:33 pm
Hello Skylar:
Thank you for confirming my suspicions on the wifi card. I’ve seen a couple others hand-soldered like that in other devices and have thought about taking the card out to add to something else (like the Seagate Dockstar). Ralink has some pretty decent Linux driver support so if you see one in something, hang on to it.
Thank you.
FIRESTORM_v1
September 5th, 2012 on 4:30 am
Android 2.2 is working fairly in my case
try and enjoy…
October 22nd, 2012 on 1:54 pm
Hi Firestorm,
My question may be diverting the subject but I feel you are the only person to whom I can ask this.
I could find many motherboards of android phones on ebay they are pretty compact and cheap. I am wondering, if there is any way to remove this Sylvania motherboard and put another high end cell-phone mother board in it keeping, screen, keyboard, speakers and track pad as it is. I tried it with laptop and android mini PC devices that are available in market for $50. It works but the screen and keyboard needs extra circuitry (Which is also available for $30). This modifications will make Sylvania net-book super fast and really worthy of use.
Please guide me.
November 2nd, 2012 on 6:38 pm
Hello Omkar:
To do something like this would take a lot of time and money tracking down the appropriate parts that are all cross compatible. If the parts weren’t directly compatible, you would need to add converter hardware into the mix. While I can appreciate why you would want to do this, I don’t think it would be feasible either from a money or a time standpoint.
I can tell for sure that the keyboard is a standard-ish format and may be able to be used in other devices and the trackpad uses a PS/2 type connection.
Good luck!
Firestorm_v1
November 2nd, 2012 on 6:44 pm
Hello Syed:
Do you have any instructions or links you can share on how you did that?
Thank you.
Firestorm_v1
November 2nd, 2012 on 6:50 pm
Hello Sheila:
Not sure where to get one, your best bet would be to take the existing battery to a place like Batteries Plus or try a hobby store that sells RC Airplanes and stuff.
Good luck!
Firestorm_v1
April 18th, 2013 on 11:46 pm
I local computer shop had one of these they probably pulled from a dumpster, and sold it to me with no charge cord or battery power. I figured for $20 it had to have some useful parts. I hadn’t seen your site, but I have been voiding warranties enough to look for the hidden screw. I found a dog had urinated on (and in) this particular netbook. It was crystalized and gross, but I am not one to waste $20. The pieces are clean and resting, awaiting reassembly and the arrival of a charge cord. If it can be made to boot up it should be fun, otherwise I will attempt to hack the TFT and some other parts, maybe to work with a RasPI. Always a joy to see someone else tinkering and horse trading 😀
July 18th, 2013 on 1:42 pm
Wow man, you bought it after a dog peed on it? That’s hardcore! At the least, you should be able to salvage the wifi dongle and use it for your RasPi. It’s mounted to the right of the LCD and is just four soldered wires in place of what looks to have been a USB plug at one point.
Good luck!
FIRESTORM_v1
July 30th, 2013 on 4:21 pm
I got one of these at a pawnshop for $10 from their as-is shelf. At that price AS is is no problem. boots up into Wince 6 and it looks like some files are missing, wifi works, battery monitor and sound are no-go. page rendering and application launching are really slow.
I guess I’ll find out if the upgrade helps it.