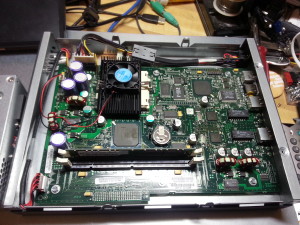
Giving a PIX firewall a new lease on life
by firestorm_v1 on Jan.24, 2014, under Embedded devices, Hardware, Networking
Buying networking equipment off of Ebay can be one of the most rewarding and frustrating challenges you may ever face. Of course, being able to identify and fix issues with newly purchased hardware may mean the difference between having purchased a $500 firewall for $11 and some parts versus buying another piece of crap for $11 that will live out its life in the back of the parts closet. In this article, I’ll cover how to replace the power supply to a Cisco PIX 506E firewall with a standard computer power supply.
Foreword
I’ve been trying to build a Cisco lab for the ICND1+ICND2 test(CCNA) for several years, slowly acquiring hardware and equipment so I could build it out properly. I ended up browsing ebay and found someone selling a Cisco PIX firewall with a power supply for $11.00 (plus $11.00 shipped) because the faceplate was broken. Thinking that this was too good a deal to pass up, I bid the $11.00 and waited. A few days later when it arrived, I was disappointed that the power supply had arrived dead. Knowing that I bought it AS-IS, I didn’t really want to bother the seller over an $11 PIX so I decided to come up with an alternative solution. Research into the Cisco PIX firewall and other devices indicated to me that the Cisco power supplies are not that diferent than the standard ATX power supply in a computer.
Wait, what?
Yes, you read that correctly. A $20 ATX computer power supply provides the same power requirements that a ($50)Cisco PIX PSU provides. After all, a PIX is essentially a computer inside of a small form factor case.
The internals of the PIX firewall share many of the same components of a typical computer. The PIX has a Pentium III Celeron 300MHz processor (with 100MHz front-side bus), 32 MB RAM (PC-100) and an 8MB flash storage. The PIX also features two Intel 10/100 NICs. The RAM is upgradeable (assuming you have some PC-100 RAM that’s small enough to fit in the case) as is the processor (although I have not yet tried). Essentially, it is a computer in a box, running special PIX software. So it seems fitting that we’re going to replace Cisco’s ATX PSU with out own ATX PSU in order to breathe more life into this machine.
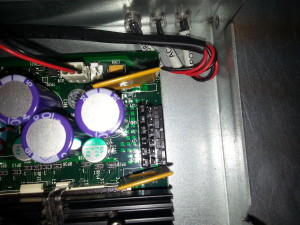
Power Connector
This is the mainboard’s power connector. Each pin is clearly marked as to its purpose and should prove to be an easy fix to figure out the pinout on the power connector. From top down in this orientation, the voltages are -12V, GND +5V +5V, GND and +12V.
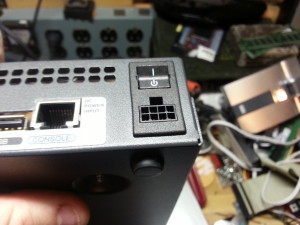
The PIX’s power switch grounds out one of the pins on this power supply connector from the outside of the case.
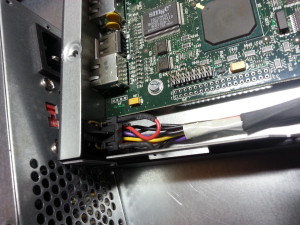
Pix Wiring Harness
This is the back of the wiring harness. That red wire is the one we’re interested in. It is the only pin that’s not accounted for between the power supply and the motherboard connector.
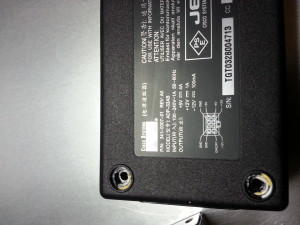
PSU Pinout
Looking at the power supply case, we find that the one pin difference is called PS-ON. After testing the PS-ON pin on the back of the PIX, it became evident to me that the Cisco power supply WAS an ATX power supply. Grounding of the PS-ON pin is supposed to cause the PSU to turn on. Unfortunately, this was not happening, resulting in a dead PIX. Since the ATX spec calls for the PS_ON pin to be grounded out, this means that an ATX power supply for a computer can be made to be pin-compatible with the Cisco PIX firewall.
Time to hack!
In order to pull this off, we will need the following tools:
- Screwdriver
- Wire cutters
- Soldering Iron and Solder
- Heat shrink tubing
- Lighter
- Zipties
We will also need the following items:
- ATX power supply ~250W. Note: Small form factor power supplies are recommended but not required. My power supply came from an old mini-tower computer.
In order to trace down the wires we need, first take a look at the pinout of the ATX power supply’s motherboard connector. We will use this to determine which wires we need to cut off the ATX header and keep for the installation. The rest of the ATX header will be discarded.

ATX Pinout
We will need the following wires:
- 2x RED wires (+5v)
- 1x YELLOW wire (+12V)
- 1x BLUE wire (-12V)
- 3x BLACK wire (GND)
- 1x GREEN wire (PS_ON)
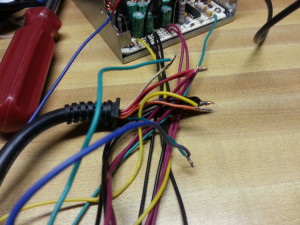
Your power supply may differ from the colors described above. When in doubt, rely on the pinout, NOT the color of the cables. Before we begin, let’s test the power supply with the PIX. Strip off a 1/8 inch piece of insulation and fold the bare wire over. Insert the wires into their respective locations on the PIX’s power supply header. You should be left over with one GREEN wire and one BLACK wire as shown in the picture below.
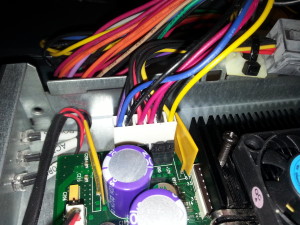
PIX testing
Short the GREEN wire to the left over BLACK wire and both the power supply and PIX should start running. (Yes, I know that screw on the heatsink isn’t actually attached to anything.) If you followed the color code correctly, your PIX should fire right up. If you let go of the GREEN wire and the BLACK wire, the PIX will power off. Our next test will involve the Cisco PIX power supply cable. Disassemble the power supply cable and seperate the cable from the casing of the power supply. You will notice that where the cable’s wires go into the motherboard, there are designations for each pin.
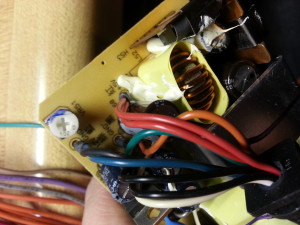
Old PSU
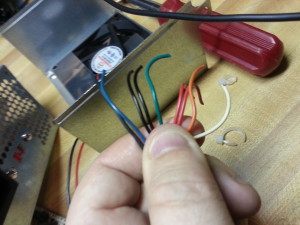
My cable consisted of several different colors of wire that didn’t completely line up with the cables on the ATX power supply. Cut each wire away as close to the PCB as possible.
Cable Wires
After tracing down the wires, here’s what each wire does:
- Shield (black shrinkwrap), Black, “Cisco Blue” wires are GND.
- Green wire is -12V.
- Red wires are +5V
- Orange is +12V
- White was PS_ON.
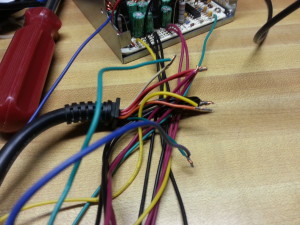
I wired up the ATX PSU to the Cisco cable and tested again. The PIX fired up and responded. On top of that, the power switch actually powered on and shut off the power supply. Remember, the power switch toggles PS_ON from GND. While not an elegant solution, I needed to test the cable integrity first.
Power Wires
Now that we have tested the cable, it’s time to do some work with the power supply. Completely disassemble the power supply down to the point where you can see both sides of the PCB. You should notice where all the wires go and you may even see designations for each wire. My power supply had everything labeled.
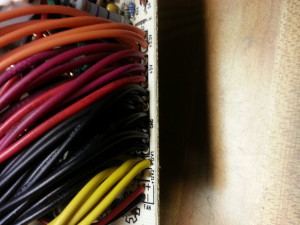
+12,+5, GND
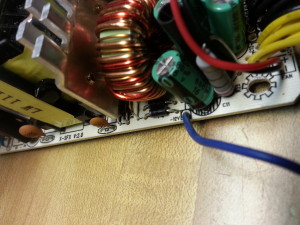
-12v
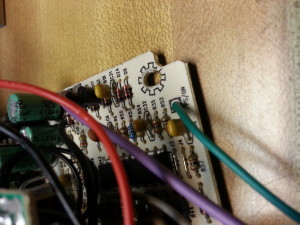
PS_ON
Now that we have our locations identified, it’s time to start removing unnecessary wires. Use the soldering iron to remove all of the wires that you DIDN’T CUT from the earlier steps. This will clear off most of the old wiring harness for the ATX power supply and should only leave you with the cut wires we started out with.
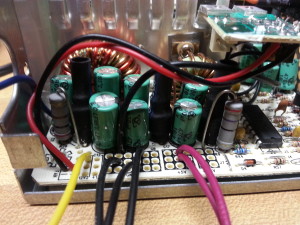
Trimmed Down
On the back of the power supply PCB, make sure that none of the solder pads are touching and that there is sufficient solder on the PCB to cover all of the holes that we made. We want to ensure that there is adequate electrical conductivity on the few wires that remain.
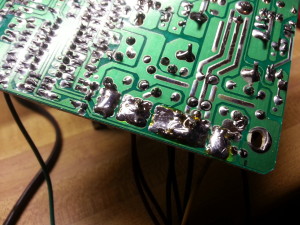
Solder side
Re-assemble the PSU but don’t put the cover on just yet. We need to splice in the Cisco power cable. For each wire that’s left, cut off a small piece of shrinkwrap and strip off about a half-inch from the end. You will want the wire short, but not short enough that soldering will be a problem. Too long and the wire may get caught in the power supply fan. Splice the two ends by wrapping them together, then by soldering them together. A good solder joint starts with a tight mechanical connection. After the splice has cooled, move the shrinkwrap over the connection and use the lighter to shrink it. Your connections should look like the following:
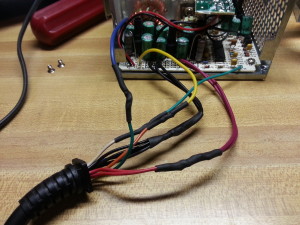
Spliced Wires
Finally, finish reassembling the power supply. Use the tie-wrap to secure the Cisco power cord’s strain relief to the side of the power supply.
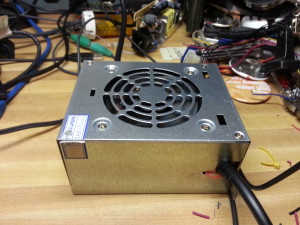
Finished Product with voided warranty sticker
Now, you have a power supply that will provide your PIX with good power while keeping itself cool too. The power switch on the PIX will turn the power supply on and off as expected. When I started out on this project, I did not think it would have come together so easily. I did this in little over an hour with all the testing, but I’m pretty sure it will take you less than that to do this on your own. Proceed slowly, pay attention to wires and voltages and take time to double check your work before you apply power.
